Ensure production readiness
This guide takes 10 minutes to complete, and aims to cover:
- Some advanced types of properties that can be added to blueprints, and what can be achieved by using them.
- The value and flexibility of scorecards in Port.
- This guide assumes you have a Port account and that you have finished the onboarding process. We will use the
Serviceblueprint that was created during the onboarding process. - You will need an accessible k8s cluster. If you don't have one, here is how to quickly set-up a minikube cluster.
- Helm - required to install a relevant integration.
The goal of this guide
In this guide we will set various standards for the production readiness of our services, and see how to use them as part of our CI.
After completing it, you will get a sense of how it can benefit different personas in your organization:
- Platform engineers will be able to define policies for any service, and automatically pass/fail releases accordingly.
- Developers will be able to easily see which policies set by the platform engineer are not met, and what they need to fix.
- R&D managers will get a bird's-eye-view of the state of all services in the organization.
Expand your service blueprint
In this guide we will add two new properties to our service blueprint, which we will then use to set production readiness standards:
- The service's
on-call, fetched from Pagerduty. - The service's
Code owners, fetched from Github.
Add an on-call to your services
In this guide we will use Pagerduty to get our services' on-call. Note that Port also has integrations for other incident response platforms.
Create the necessary Pagerduty resources
If you already have a Pagerduty account that you can play around with, feel free to skip this step.
-
Create a Pagerduty account (free 14-day trial).
-
Create a new service:

- Name the service
DemoPdService. - Choose the existing
Defaultescalation policy. - Under
Reduce noiseuse the recommended settings. - Under
Integrationsscroll down and click onCreate service without an integration.
Integrate Pagerduty into Port
Now let's bring our Pagerduty data into Port. Port's Pagerduty integration automatically fetches Services and Incidents, and creates blueprints and entities for them.
For this installation you will need Helm and a running K8s cluster (see prerequisites).
- Install Port's Pagerduty integration using Helm, by running the command below in your terminal.
The command below will install the integration in Realtime & always on mode. If you prefer to use a one-time (scheduled) installation instead, see the Pagerduty installation section.
-
Replace
CLIENT_IDandCLIENT_SECRETwith your credentials (get them here). -
Replace
tokenwith your Pagerduty token. To obtain it:- Hover over your avatar in the top right corner of your Pagerduty app, then click
My profile. - Click the
User settingstab and scroll to the bottom. - Click on
Create API User Tokenand provide a name. - Copy the new token value.
- Hover over your avatar in the top right corner of your Pagerduty app, then click

Installation command (click to expand)
helm repo add port-labs https://port-labs.github.io/helm-charts
helm upgrade --install my-pagerduty-integration port-labs/port-ocean \
    --set port.clientId="CLIENT_ID" \   # REPLACE VALUE
    --set port.clientSecret="CLIENT_SECRET"  \   # REPLACE VALUE
    --set initializePortResources=true  \
    --set integration.identifier="my-pagerduty-integration"  \
    --set integration.type="pagerduty"  \
    --set integration.eventListener.type="POLLING"  \
    --set integration.secrets.token="token"  \   # REPLACE VALUE
    --set integration.config.apiUrl="https://api.pagerduty.com"
Great! Now that the integration is installed, we should see some new components in Port:
- Go to your Builder, you should now see two new blueprints created by the integration -
PagerDuty ServiceandPagerDuty Incident. - Go to your Software catalog, click on
PagerDuty Servicesin the sidebar, you should now see a new entity created for ourDemoPdService, with a populatedOn-callproperty.
Add an on-call property to the service blueprint
Now that Port is synced with our Pagerduty resources, let's reflect the Pagerduty service's on-call in our services.
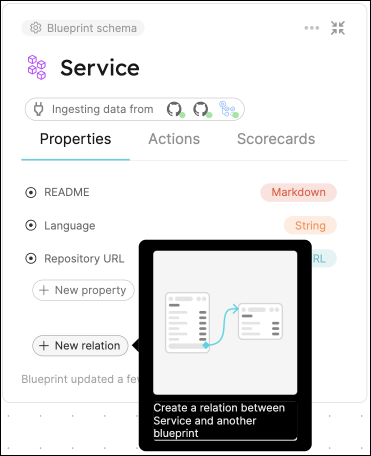
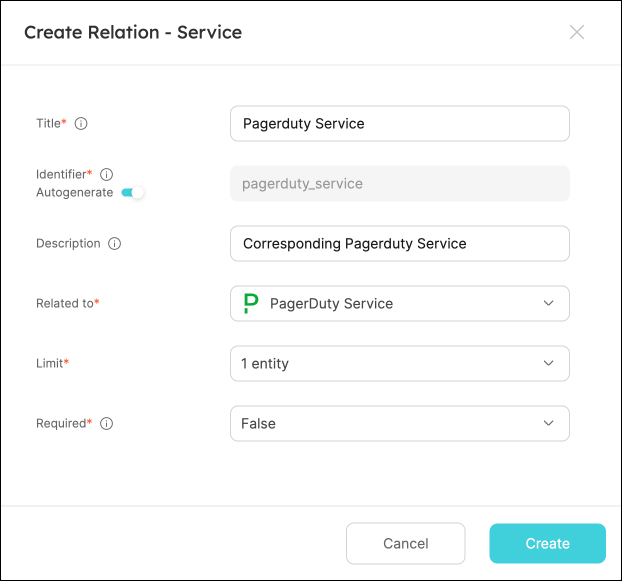
First, we will need to create a relation between our services and the corresponding Pagerduty services.
- Fill out the form like this, then click
Create:
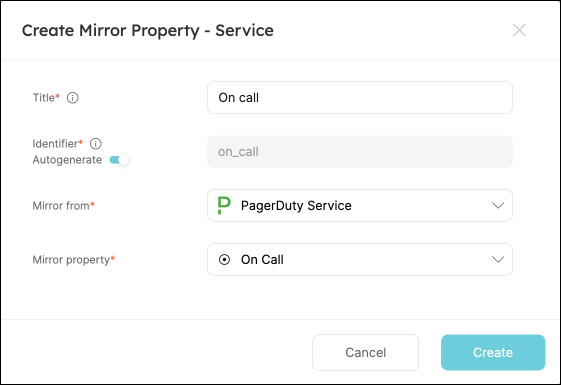
Now that the blueprints are related, let's create a mirror property in our service to display its on-call.
- Choose the
Serviceblueprint again, and under thePagerDuty Servicerelation, click onNew mirror property.
Fill the form out like this, then clickCreate:
- Now that our mirror property is set, we need to assign the relevant Pagerduty service to each of our services. This can be done by adding some mapping logic. Go to your data sources page, and click on your Pagerduty integration:

Add the following YAML block to the mapping under the resources key, then click save & resync:
Relation mapping (click to expand)
- kind: services
  selector:
    query: "true"
  port:
    entity:
      mappings:
        identifier: .name | gsub("[^a-zA-Z0-9@_.:/=-]"; "-") | tostring
        title: .name
        blueprint: '"service"'
        properties: {}
        relations:
          pagerduty_service: .id
What we just did was map the Pagerduty service to the relation between it and our services.
Now, if our service identifier is equal to the Pagerduty service's name, the service will automatically have its on-call property filled: 🎉

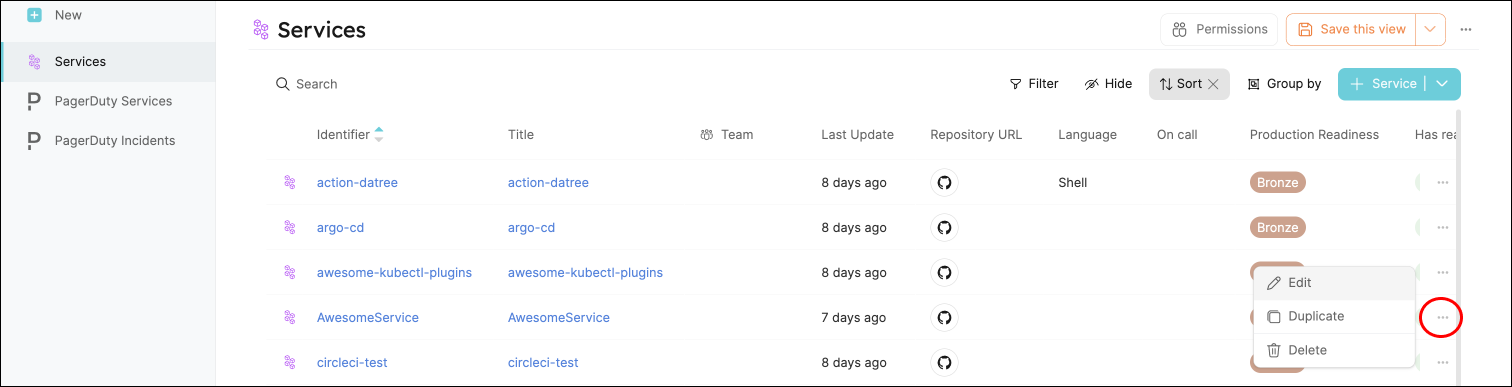
Note that you can always perform this assignment manually if you wish:
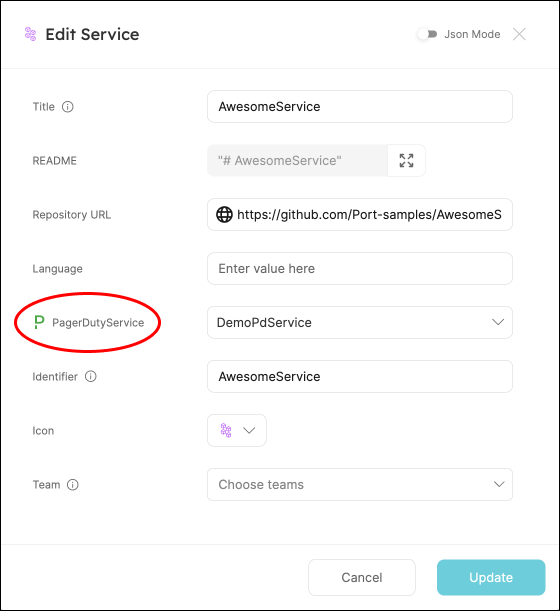
- Go to your Software catalog, choose any service in the table under
Services, click on the..., and clickEdit:
- In the form you will now see a property named
PagerDuty Service, choose theDemoPdServicewe created from the dropdown, then clickUpdate:
Display each service's code owners
Git providers allow you to add a CODEOWNERS file to a repository specifiying its owner/s. See the relevant documentation for details and examples:
- GitHub
- GitLab
- Bitbucket
Let's see how we can easily ingest a CODEOWNERS file into our existing services:
Add a codeowners property to the service blueprint
-
Go to your Builder again, choose the
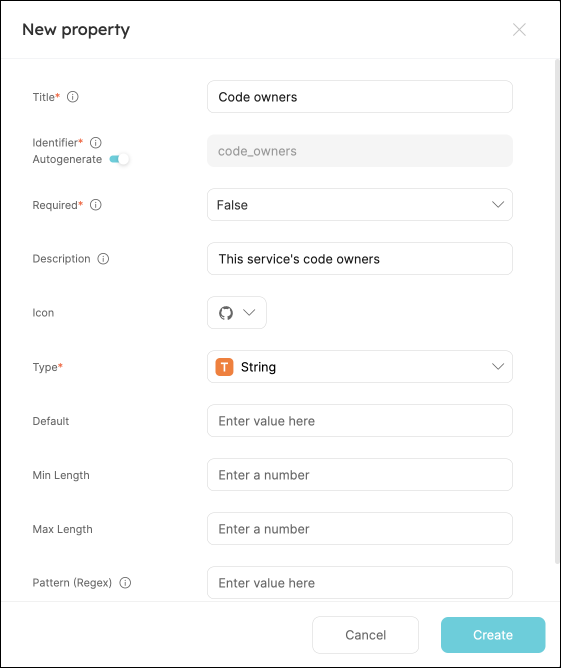
Serviceblueprint, and clickNew property. -
Fill in the form like this:
Note theidentifierfield value, we will need it in the next step.
-
Next we will update the Github exporter mapping and add the new property. Go to your data sources page.
-
Under
Exporters, click on the Github exporter with your organization name. -
In the mapping YAML, add the line
code_owners: file://CODEOWNERSas shown here, then clickResync:
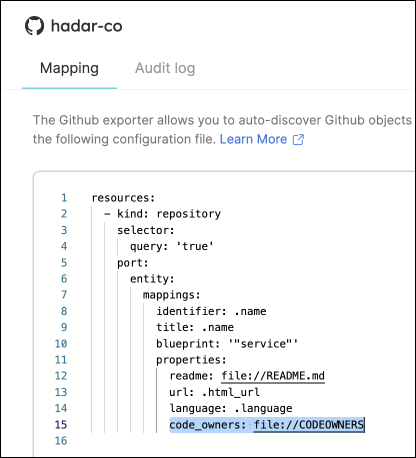
Remember the identifier from step 2? This tells Port how to populate the new property 😎
Going back to our Catalog, we can now see that our entities have their code owners displayed:
![]()
Update your service's scorecard
Now let's use the properties we created to set standards for our services.
Add rules to existing scorecard
Say we want to ensure each service meets our new requirements, with different levels of importance. Our Service blueprint already has a scorecard called Production readiness, with three rules.
Let's add our metrics to it:
Bronze- each service must have aReadme(we have already defined this in the quickstart guide).Silver- each service must have an on-call defined.
Now let's implement it:
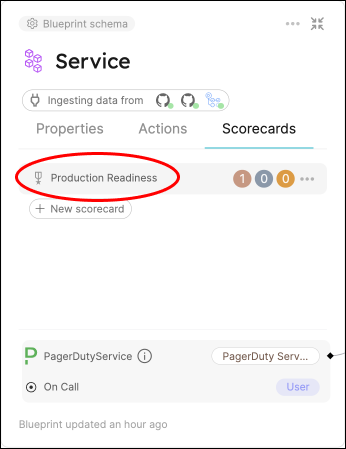
- Go to your Builder, choose the
Serviceblueprint, click onScorecards, then click our existingProduction readinessscorecard:
- Replace the content with this, then click
Save:
Scorecard schema (click to expand)
{
  "identifier": "ProductionReadiness",
  "title": "Production Readiness",
  "rules": [
    {
      "identifier": "hasReadme",
      "title": "Has a readme",
      "level": "Bronze",
      "query": {
        "combinator": "and",
        "conditions": [
          {
            "operator": "isNotEmpty",
            "property": "readme"
          }
        ]
      }
    },
    {
      "identifier": "hasTeam",
      "title": "Has Team",
      "level": "Silver",
      "query": {
        "combinator": "and",
        "conditions": [
          {
            "operator": "isNotEmpty",
            "property": "$team"
          }
        ]
      }
    },
    {
      "identifier": "hasSlackChannel",
      "title": "Has a Slack channel",
      "level": "Gold",
      "query": {
        "combinator": "and",
        "conditions": [
          {
            "operator": "isNotEmpty",
            "property": "slack"
          }
        ]
      }
    },
    {
      "identifier": "hasCodeowners",
      "title": "Has Codeowners",
      "description": "Checks if a service has a codeowners file",
      "level": "Silver",
      "query": {
        "combinator": "and",
        "conditions": [
          {
            "operator": "isNotEmpty",
            "property": "code_owners"
          }
        ]
      }
    },
    {
      "identifier": "hasOncall",
      "title": "Has On-call",
      "level": "Gold",
      "query": {
        "combinator": "and",
        "conditions": [
          {
            "operator": "isNotEmpty",
            "property": "on_call"
          }
        ]
      }
    }
  ]
}
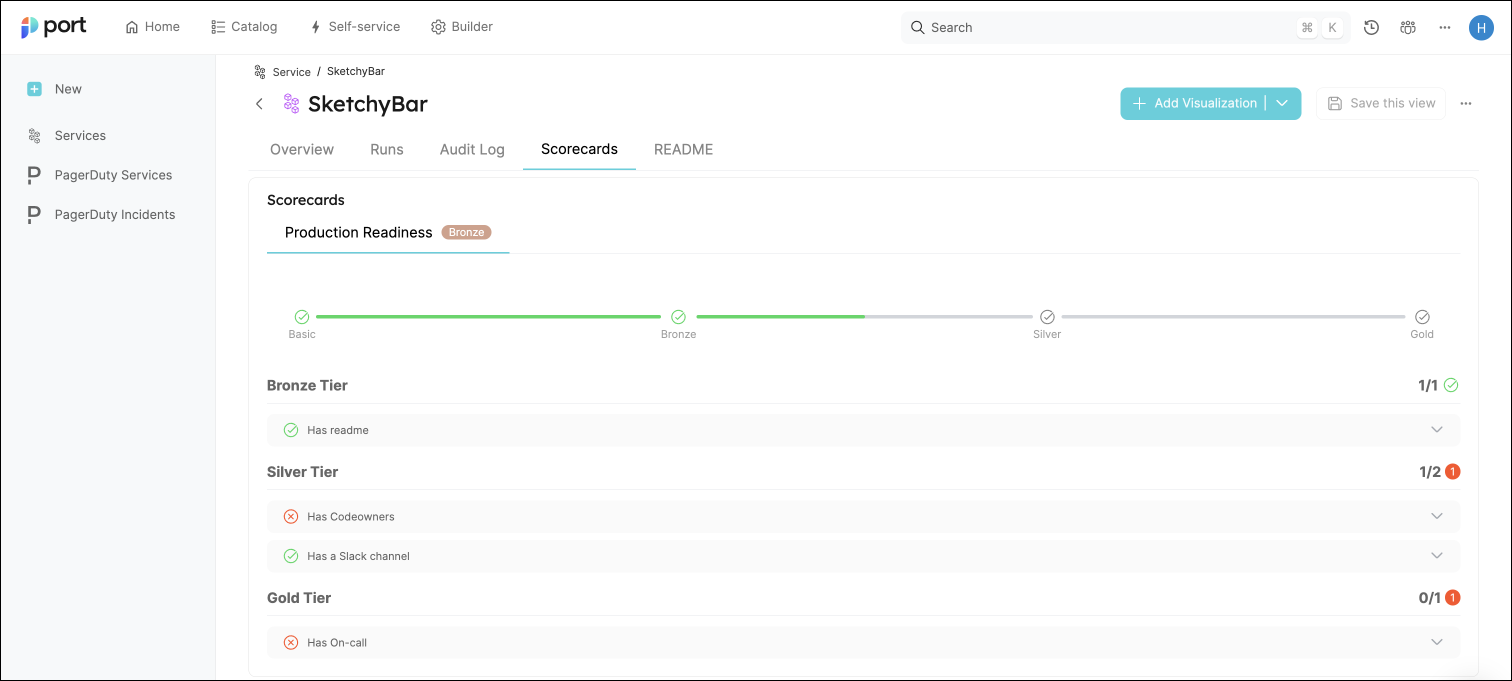
Now go to your Catalog and click on any of your services. Click on the Scorecards tab and you will see the score of the service, with details of which checks passed/failed:
Possible daily routine integrations
- Use Port's API to check for scorecard compliance from your CI and pass/fail it accordingly.
- Notify periodically via Slack about services that fail gold/silver/bronze validations.
- Send a weekly/monthly report for managers showing the number of services that do not meet specific standards.
Conclusion
Production readiness is something that needs to be monitored and handled constantly. In a microservice-heavy environment, things like codeowners and on-call management are critical.
With Port, standards are easy to set-up, prioritize and track. Using Port's API, you can also create/get/modify your scorecards from anywhere, allowing seamless integration with other platforms and services in your environment.
More relevant guides and examples: