Get started with AWS
This guide takes 5 minutes to complete, and aims to quickly integrate your AWS environment into Port.
- While it is not mandatory for this guide, we recommend that you complete the onboarding process before proceeding.
- You will need an active Port account.
- The Terraform CLI is required to install the AWS exporter.
- The AWS CLI is used for authentication. Make sure your AWS
Access key idandSecret access keyare set. If not, runaws configurein your terminal to configure them.
The goal of this guide
In this guide we will install Port's AWS exporter, ingest AWS resources into Port, and create a visualization from their data.
After completing it, you will get a sense of how it can benefit different personas in your organization:
- Developers and devops will be track AWS resources and their health & status.
- Platform engineers will be able to create and monitor dashboards & visualizations displaying valuable data from their AWS environments.
Install Port's AWS exporter
-
Go to your Port application, click on the
...in the top right corner, then clickCredentials. Copy yourClient IDandClient secret. -
Replace
YOUR-PORT-CLIENT-IDandYOUR-PORT-CLIENT-SECRETin the following command, then copy it and run it in your terminal:
Note that this command will clone a repository in the current working directory of your terminal
AWS exporter installation (click to expand)
# Export your Port credentials
export PORT_CLIENT_ID=YOUR-PORT-CLIENT-ID
export PORT_CLIENT_SECRET=YOUR-PORT-CLIENT-SECRET

# Clone the terraform template
git clone https://github.com/port-labs/template-assets.git

cd template-assets/aws

# Initialize the Terraform requirements
terraform init

# Deploy the aws exporter and provide the resources you want to export
terraform apply -var 'resources=["lambda", "s3_bucket"]'
In the snippet above, we only ingest lambda and s3_bucket resources. You can ingest additional resources by adding them to the resources list.
Other supported resources are ecs_service, sns, sqs, rds_db_instance, dynamodb_table, and ec2_instance.
What just happened?
The exporter installation did three things:
- It created blueprints for the resources you specified in the installation command, you can see them in your builder.
- It created entities for the resources fetched from your AWS environment, you can see them in your software catalog.
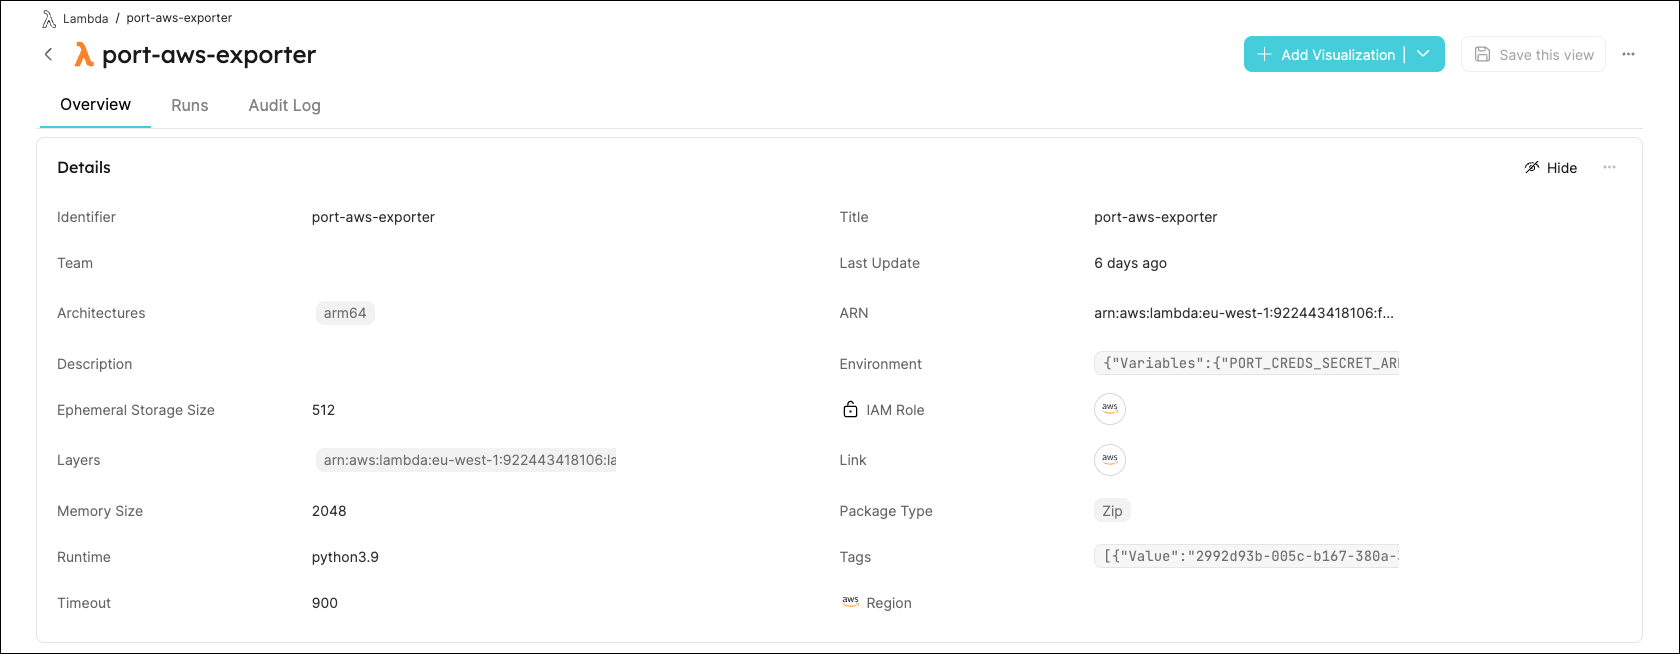
- It creates a JSON configuration file in an s3 bucket in your AWS environment, which contains a mapping definition to fill the entities' properties with data from your environment. For example, your lambdas catalog page contains the following entity with its properties filled:
To make changes to your configuration after installation, use the command described in the AWS exporter page.
💁🏽 You don't need to change anything in the configuration for this guide, this is just an FYI
Visualize data from your AWS resources
Port's homepage is a dashboard that allows you to create various visualizations of data from your entities.
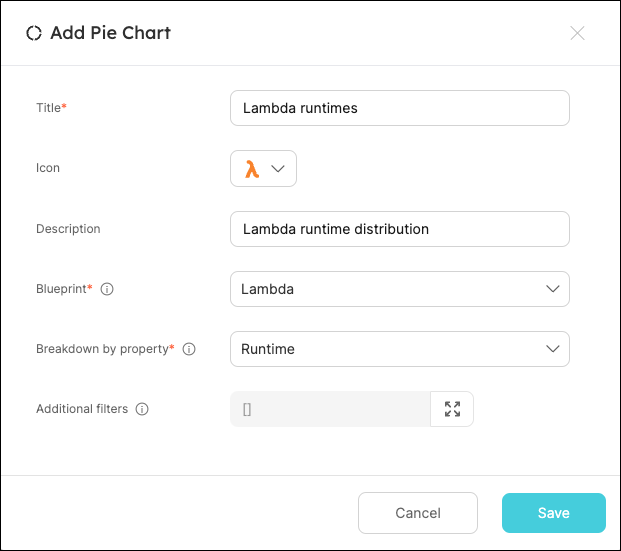
Let's create a simple pie chart in our homepage to show the distribution of our Lambdas by Runtime:
- Go to your homepage.
- Click on the
+ Addbutton in the top right corner, and choosePie chart. - Fill the form out like this, then click
Save:
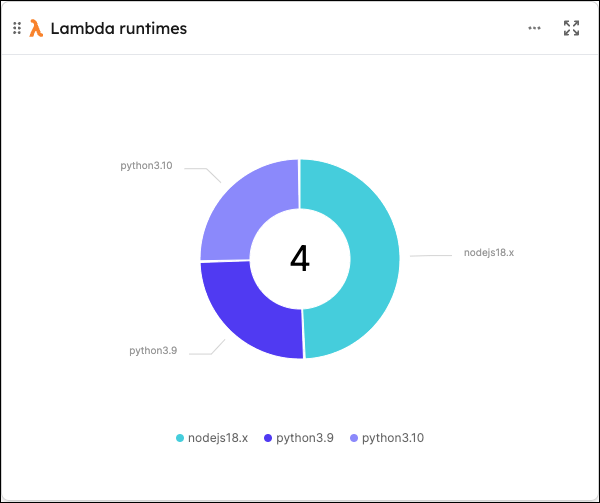
You should now see the pie chart in your homepage:
Conclusion
AWS environments are complex and data-rich. Port's AWS exporter allows you to easily ingest resources from your AWS environment into Port, but this is just the starting point.
Once your data has been ingested, you can use Port to visualize relevant data, automate routine tasks using self-service actions, track metrics for your resources, and much more.
For a deeper dive into Port's integration with AWS (including examples), see the AWS integration section.
More guides & tutorials will be available soon, in the meantime feel free to reach out with any questions via our community slack or Github project.