Webhook
Overview
The webhook backend allows you to trigger your own custom webhooks, for both self-service actions and automations.
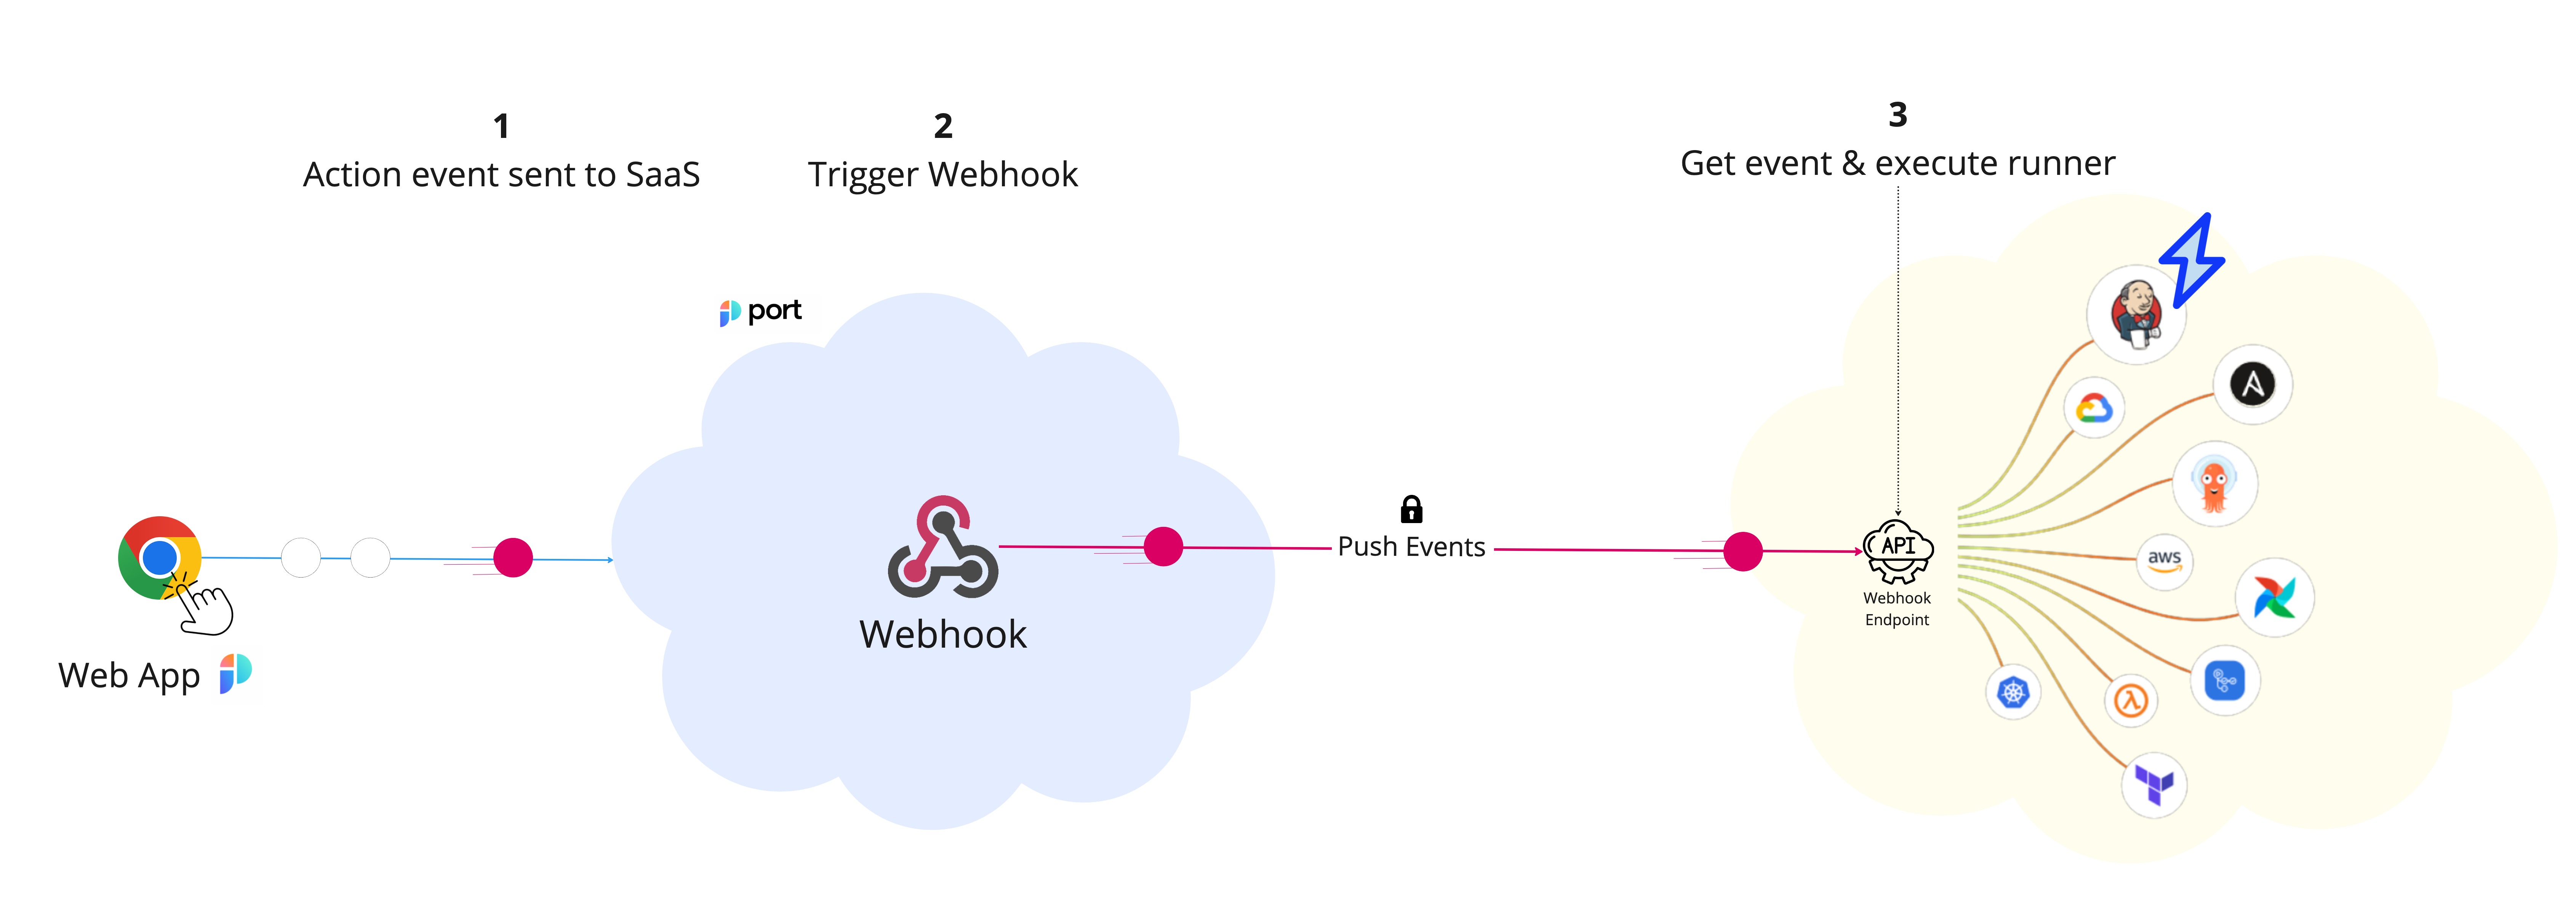
The steps shown in the image above are as follows:
-
Port generates an invocation of an action/automation.
-
Port signs the payload + timestamp using
HMAC-SHA-256and puts it in the request header.WEBHOOK SECURITYVerifying the webhook request using the request headers provides the following benefits:
-
Ensures that the request payload has not been tampered with.
-
Ensures that the sender of the message is Port.
-
Ensures that the received message is not a replay of an older message.
To learn how to verify the webhook request, refer to the Verifying Webhook Signature page.
-
-
Port publishes an invoked action/automation via a
POSTrequest to the customer definedURL. -
A listener implemented on the Client side receives the
POSTrequest and runs custom logic provided by the user.
The listener can be anything that can read from a Kafka topic and run code based on the received message, for example:
- AWS Lambda.
- Python code that reads from the topic.
- Docker container running code.
You control how you interact with webhooks, in the way that best suits your organization and infrastructure.
An example flow would be:
- A developer asks to deploy a new version of an existing
Microservice. - The
createaction is sent to the definedURL. - An AWS Lambda function is triggered by this new action message.
- The Lambda function deploys a new version of the service.
- When the Lambda is done, it reports back to Port about the new Microservice
Deployment.
Configuration
When using this backend, there are several configurations that you can customize:
Use Port secrets for sensitive data
Sensitive data such as tokens and passwords can be stored using Port secrets.
Sometimes your webhook URL might contain sensitive data, such as a token.
To use a secret in the URL, you can reference it using {{ .secrets.secret_name }}.
https://example.com?token={{ .secrets.secret_token_name }}
Use Port agent
The Port execution agent provides you with a secure and convenient way to act upon webhook invocations of self-service actions and automations.
The agent pulls the new invocation event from your dedicated Kafka topic, and sends it to the URL you specified.
If you prefer to send a webhook without using the agent, you can validate the webhook signature for increased security.
To use the agent, set the agent field to true in the invocationMethod object, or set the Use self-hosted agent toggle to Yes if using the UI.
Request type - sync vs. async
By default, the action will be executed asynchronous, meaning that your backend will need to explicitly send Port its result via the API.
Alternatively, you can set the execution type to synchronous, which will cause the action to automatically report its result back to Port via the returned HTTP status code and payload.
HTTP method
By default, a POST request will be sent to the specified endpoint URL.
You can change the request to any of the supported types: POST, GET, PUT, DELETE, or PATCH.
Trigger Port API
You can use this backend type to trigger Port's API, allowing you to execute any route you wish with automatic authentication.
Port will automatically use the organization's API key to authenticate the request.
This can be useful when you want to perform an operation in Port, such as creating a new user or executing a self-service action, especially if you want to trigger logic that you have already defined.
Example - Triggering a self-service action
Say you have a self-service action that sends a Slack notification, with the identifier slack_notify.
The following example shows an automation definition that triggers this self-service action, when a service's passed property changes from Passed to Not passed:
Automation definition (click to expand)
Port exposes two API instances, one for the EU region of Port, and one for the US region of Port.
- If you use the EU region of Port (https://app.port.io), your API URL is
https://api.port.io. - If you use the US region of Port (https://app.us.port.io), your API URL is
https://api.us.port.io.
{
  "identifier": "slack_notify_on_service_failure",
  "title": "Notify via Slack on service failure",
  "trigger": {
    "type": "automation",
    "event": {
      "type": "ENTITY_UPDATED",
      "blueprintIdentifier": "service"
    },
    "condition": {
      "type": "JQ",
      "expressions": [
        ".diff.before.properties.passed == \"Passed\"",
        ".diff.after.properties.passed == \"Not passed\""
      ],
      "combinator": "and"
    }
  },
  "invocationMethod": {
    "type": "WEBHOOK",
    "url": "https://api.getport.io/v1/actions/slack_notify/runs?run_as=user-email@gmail.com",
    "synchronized": true,
    "method": "POST",
    "body": {
      "properties": {
        "message": "Service {{ .event.diff.before.title }} has degraded from `Passed` to `Not passed`."
      }
    }
  },
  "publish": true
}
synchronizedmust be set totrue, so that the automation's status will be updated when the action is triggered.- In the
urlfield, you can addrun_asto the url to specify the user that will execute the action (replaceuser-email@gmail.comwith the desired user's email).
If you don't specify a user, the action will be executed using the organization's default credentials. - The
body.propertiesobject contains the action's user inputs. If the action does not require any inputs, pass an empty object:"body": {
"properties": {}
}
Local setup, debugging and security validation
Examples
For guides and examples of self-service actions using a webhook as the backend, check out the guides section.