Installation
Installation Methods
The Google Cloud Ocean integration relies on the Google Cloud Client libraries, which are authenticated using Application Default Credentials.
In these guides, you can install the integration in various ways, according to the authentication method + platform you choose to run the integration on.
For your first deployment of the GCP exporter, we recommend starting with the Helm/scheduled installation method to perform the initial data sync. Once the initial data sync is complete, you can switch to the Terraform deployment method for real-time data sync.
- Helm (Scheduled)
- CI/CD (Scheduled)
- Docker(Once)
- Terraform ( Real Time Events )
The Ocean Google Cloud integration uses Google's ADC (Application Default Credentials). In order to properly set-up, this guide will be divided into two parts:
- Creating a service account.
- Running the Helm Command.
Creating a service account
-
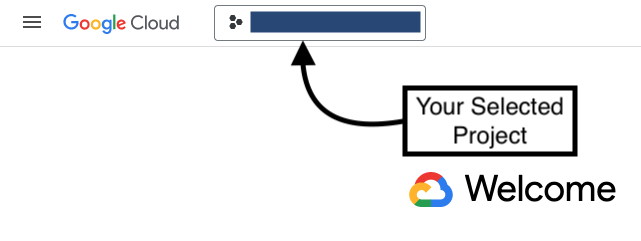
Make sure you have your selected project in the top left toggle.
-
In the search text box, search for
service accounts. Click theIAM & Adminoption.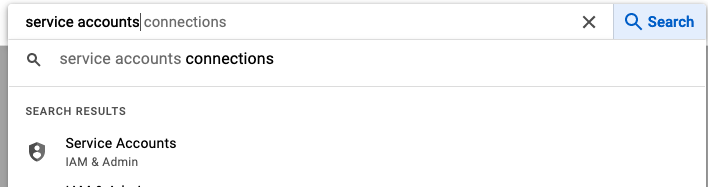
-
Click on
CREATE SERVICE ACCOUNT.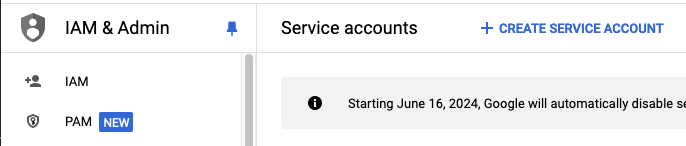
-
Fill up an ID and a description,
continue.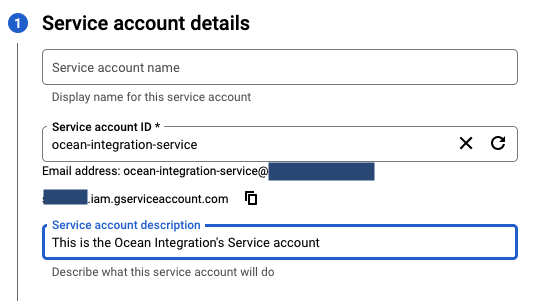
-
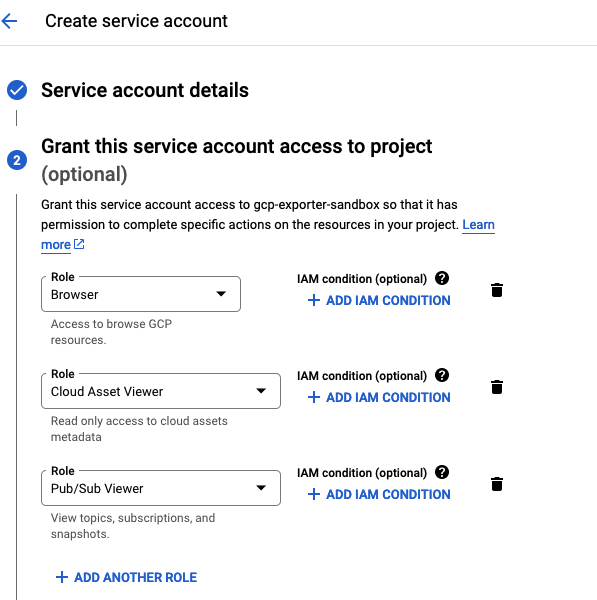
Click the
Select a roledropdown, then search and add the following Roles:- Browser
- Cloud Asset Viewer
- Pub/Sub Viewer
Should look like this:
-
Click on continue -> Done
-
You've successfully finished creating a Service account!
Fetching Key file
There are multiple ways to use the service account we just created. In this guide, we'll use the Service Account Key method.
According to Google Cloud, This isn't the preferred way for Production purposes. The Terraform Installation is using Google's native method to authenticate, and is the one we propose for a Production setup.
-
Make sure you have your selected project in the top left toggle.
-
In the search text box, search for
service accounts. Click theIAM & Adminoption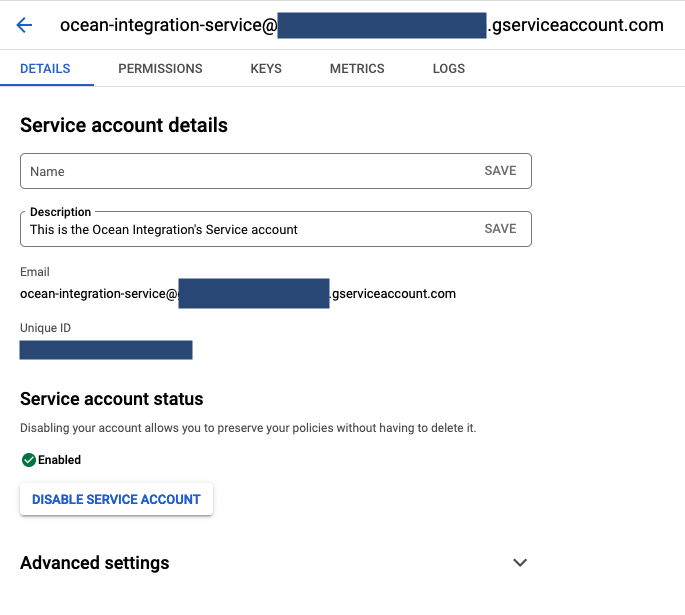
-
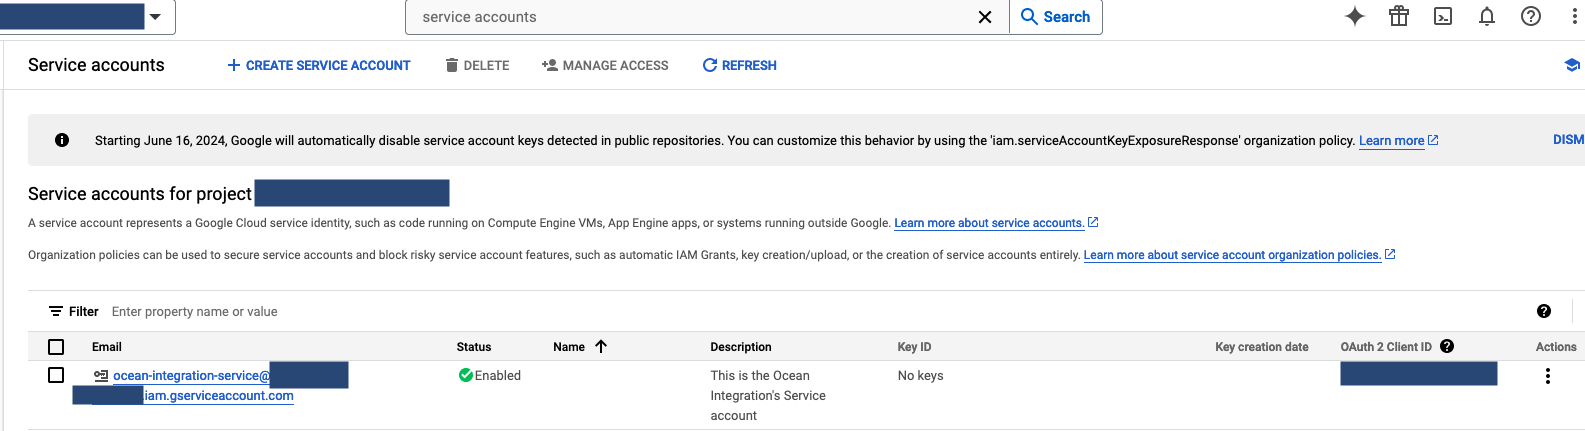
Click on the Service account.
Should look like this:
-
Click on
Keys->Add Key->Create new key->JSON->CREATE -
This will download your new Service Account Key configuration file.
-
Done!
Running the Helm command
The Ocean integration does not store the encoded file anywhere.
It is saved locally, and is NOT sent to Port at any time.
-
Take the service account key file you create, and run this command:
cat <new-configuration-file> | base64 | pbcopy -
Run the following command:
helm repo add --force-update port-labs https://port-labs.github.io/helm-charts
helm upgrade --install gcp port-labs/port-ocean \
  --set port.clientId="$PORT_CLIENT_ID"  \
  --set port.clientSecret="$PORT_CLIENT_SECRET_ID"  \
  --set port.baseUrl="https://api.getport.io"  \
  --set initializePortResources=true  \
  --set sendRawDataExamples=true  \
  --set scheduledResyncInterval=1440 \
  --set integration.identifier="ocean-gcp-integration"  \
  --set integration.type="gcp"  \
  --set integration.eventListener.type="POLLING"  \
  --set integration.config.encodedADCConfiguration="<paste_the_encoded_file_content_here>"
Optional- Scale permissions for a Service account
The above gives a service account permissions in it's Project's scope. You are able to add permissions at other projects/folders/organization level.
-
Make sure you have your selected project in the top left toggle.
-
In the search text box, search for
service accounts. Click theIAM & Adminoption
-
Click on the Service account.
Should look like this:
-
Copy the service account's email.
-
Switch the top left toggle to your organization
-
In the search text box, search for
manage resources. Click theIAM & Adminoption.
-
In the
ResourcesTable, you see all projects+folders connected to your organization.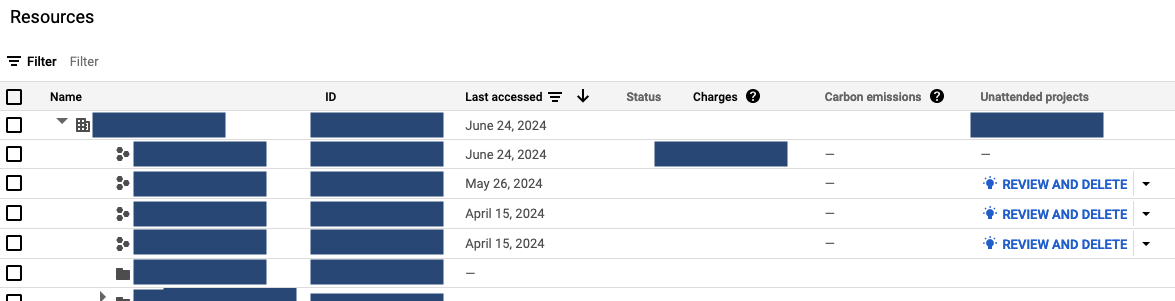
-
Pick your desired scope (organization/folders/projects), using the left checkboxes.

-
This will open up a menu on the right side.

-
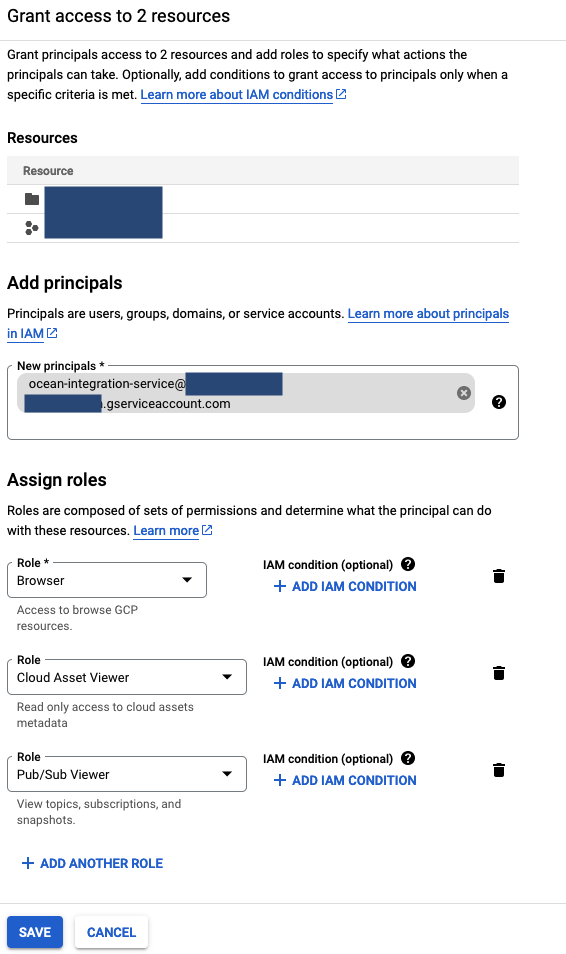
Click on
ADD PRINCIPLE -
In the
Add principalstab add the email to your service account. In the Assign roles, give these three roles to your service account:- Browser
- Cloud Asset Viewer
- Pub/Sub Viewer
Should look like this:
- Click on
Save
- GitHub Actions
The Ocean Google Cloud integration uses Google's ADC (Application Default Credentials). In order to properly set-up, this guide will be divided into two parts:
- Creating a service account.
- Setting up the GitHub Actions workflow.
Creating a service account
-
Make sure you have your selected project in the top left toggle.
-
In the search text box, search for
service accounts. Click theIAM & Adminoption.
-
Click on
CREATE SERVICE ACCOUNT.
-
Fill up an ID and a description,
continue.
-
Click the
Select a roledropdown, then search and add the following Roles:- Browser
- Cloud Asset Viewer
- Pub/Sub Viewer
Should look like this:
-
Click on continue -> Done
-
You've successfully finished creating a Service account!
Fetching Key file
There are multiple ways to use the service account we just created. In this guide, we'll use the Service Account Key method.
According to Google Cloud, This isn't the preferred way for Production purposes. The Terraform Installation is using Google's native method to authenticate, and is the one we propose for a Production setup.
-
Make sure you have your selected project in the top left toggle.
-
In the search text box, search for
service accounts. Click theIAM & Adminoption
-
Click on the Service account.
Should look like this:
-
Click on
Keys->Add Key->Create new key->JSON->CREATE -
This will download your new Service Account Key configuration file.
-
Done!
Setting up the GitHub Actions workflow
The Ocean integration does not store the encoded file anywhere.
It is saved locally, and is NOT sent to Port at any time.
-
Take the service account key file you create, and run this command:
cat <new-configuration-file> | base64 | pbcopy
Make sure to configure the following Github Secrets:
-
Port API credentials, you can check out the Port API documentation.
OCEAN__PORT_CLIENT_IDOCEAN__PORT_CLIENT_SECRET
-
Google Cloud Service Account Key
OCEAN__SECRET__ENCODED_ADC_CONFIGURATION- Paste the encoded file content here.
Here is an example for gcp-integration.yml workflow file:
name: GCP Integration

on:
  workflow_dispatch:
  schedule:
    - cron: '0 */4 * * *' # Determines the scheduled interval for this workflow. This example runs every 4 hours.

jobs:
  run-integration:
    runs-on: ubuntu-latest

    steps:
      - name: Run gcp Integration
        uses: port-labs/ocean-sail@v1
        with:
          type: gcp
          port_client_id: ${{ secrets.PORT_CLIENT_ID }}
          port_client_secret: ${{ secrets.PORT_CLIENT_SECRET }}
          port_base_url: "https://api.getport.io"
          config: |
            encoded_adc_configuration: ${{ secrets.OCEAN__SECRET__ENCODED_ADC_CONFIGURATION }}
The Ocean Google Cloud integration uses Google's ADC (Application Default Credentials). In order to properly set-up, this guide will be divided into two parts:
- Creating a service account.
- Running the Docker Command.
Creating a service account
-
Make sure you have your selected project in the top left toggle.
-
In the search text box, search for
service accounts. Click theIAM & Adminoption.
-
Click on
CREATE SERVICE ACCOUNT.
-
Fill up an ID and a description,
continue.
-
Click the
Select a roledropdown, then search and add the following Roles:- Browser
- Cloud Asset Viewer
- Pub/Sub Viewer
Should look like this:
-
Click on continue -> Done
-
You've successfully finished creating a Service account!
Fetching Key file
There are multiple ways to use the service account we just created. In this guide, we'll use the Service Account Key method.
According to Google Cloud, This isn't the preferred way for Production purposes. The Terraform Installation is using Google's native method to authenticate, and is the one we propose for a Production setup.
-
Make sure you have your selected project in the top left toggle.
-
In the search text box, search for
service accounts. Click theIAM & Adminoption
-
Click on the Service account.
Should look like this:
-
Click on
Keys->Add Key->Create new key->JSON->CREATE -
This will download your new Service Account Key configuration file.
-
Done!
Running the Docker command
The Ocean integration doesn't store the encoded file anywhere but locally. It's NOT being sent to Port.
-
Take the service account key file you create, and run this command:
cat <new-configuration-file> | base64 | pbcopy -
Run the following command:
docker run -i --rm --platform=linux/amd64 \
-e OCEAN__PORT__CLIENT_ID="$PORT_CLIENT_ID" \
-e OCEAN__PORT__CLIENT_SECRET="$PORT_CLIENT_SECRET" \
-e OCEAN__PORT__BASE_URL="https://api.getport.io" \
-e OCEAN__INITIALIZE_PORT_RESOURCES=true \
-e OCEAN__SEND_RAW_DATA_EXAMPLES=true \
-e OCEAN__EVENT_LISTENER='{"type": "ONCE"}' \
-e OCEAN__INTEGRATION__CONFIG__ENCODED_ADC_CONFIGURATION="<paste_the_encoded_file_content_here>" \
ghcr.io/port-labs/port-ocean-gcp:latest
Optional- Scale permissions for a Docker Service account
The above gives a service account permissions in it's Project's scope. You are able to add permissions at other projects/folders/organization level.
-
Make sure you have your selected project in the top left toggle.
-
In the search text box, search for
service accounts. Click theIAM & Adminoption
-
Click on the Service account.
Should look like this:
-
Copy the service account's email.
-
Switch the top left toggle to your organization
-
In the search text box, search for
manage resources. Click theIAM & Adminoption.
-
In the
ResourcesTable, you see all projects+folders connected to your organization.
-
Pick your desired scope (organization/folders/projects), using the left checkboxes.
-
This will open up a menu on the right side.
-
Click on
ADD PRINCIPLE -
In the
Add principalstab add the email to your service account. In the Assign roles, give these three roles to your service account:- Browser
- Cloud Asset Viewer
- Pub/Sub Viewer
Should look like this:
- Click on
Save
The GCP integration is deployed using Terraform on Google Cloud Cloud Run.
It uses our Terraform Ocean Integration Factory module to deploy the integration.
Prerequisites
- Terraform >= 1.9.1
- hashicorp/google Terraform Provider >= 5.25
- hashicorp/google-beta Terraform Provider >= 5.25
- A logged in gCloud CLI with enough Permissions
- Artifact Registry Image
- Enabled APIs:
Artifact Registry Image
In order to run the Cloud Run Service, it's mandatory to have a working Image. Currently our GHCR based images aren't supported by Google Cloud's Cloud run platform, so a manual installation to Dockerhub\Artifact registry is required. In the guide we specify an Artifact registry approach, but a similar DockerHub approach should yield the same results:
-
Create an Artifact Registry in GCP.
-
Pull our AMD based image from our GHCR registry
docker pull ghcr.io/port-labs/port-ocean-gcp --platform amd64 -
Tag this image
docker tag ghcr.io/port-labs/port-ocean-gcp:latest <your_artifact_registry_/_dockerhub>/port-ocean-gcp:<your_version> -
Push the image to your artifact registry:
docker push <your_artifact_registry_/_dockerhub>/port-ocean-gcp:<your_version>
Required permissions to run terraform apply
In order to successfully deploy the Google Cloud integration, it's crucial to ensure that the user who deploys the integration in the GCP Organization has the appropriate access permissions.
The Google Cloud integration uses the following GCP infrastructure:
- GCP Cloud Run.
- GCP PubSub Topic & Subscription.
- GCP Roles & Service accounts.
- GCP Cloud Assets
- GCP Cloud Asset Inventory
- GCP Cloud Asset Feed (Used for real-time data sync to Port)
Our Terraform module creates a dedicated service account with it's own permissions, and is not related to these permissions.
You can either deploy using your own permissions, or impersonating a service account. Either way, the following permissions should be granted:
Required Permissions
cloudasset.assets.exportResource
cloudasset.feeds.create
cloudasset.feeds.delete
cloudasset.feeds.get
cloudasset.feeds.list
cloudasset.feeds.update
iam.roles.create
iam.roles.delete
iam.roles.get
iam.roles.undelete
iam.roles.update
iam.serviceAccountKeys.get
iam.serviceAccounts.actAs
iam.serviceAccounts.create
iam.serviceAccounts.delete
iam.serviceAccounts.get
pubsub.subscriptions.consume
pubsub.subscriptions.create
pubsub.subscriptions.delete
pubsub.subscriptions.get
pubsub.subscriptions.list
pubsub.subscriptions.update
pubsub.topics.attachSubscription
pubsub.topics.create
pubsub.topics.delete
pubsub.topics.get
pubsub.topics.list
pubsub.topics.update
resourcemanager.organizations.getIamPolicy
resourcemanager.organizations.setIamPolicy
run.operations.get
run.services.create
run.services.delete
run.services.get
serviceusage.services.use
Installation walkthrough
Run the following commands. Make sure to replace <placeholders> with actual values.
If you want the integration to collect resources from more projects/folders/organization, make sure that you set up permissions properly.
echo 'provider "google-beta" { user_project_override = true }
provider "google" { user_project_override = true }
module "gcp" {
source = "port-labs/integration-factory/ocean//examples/gcp_cloud_run"
version = ">=0.0.31"
port_client_id = "<your_port_client_id>"
port_client_secret = "<your_port_client_secret>"
gcp_ocean_integration_image = "<your_artifact_registry_/_dockerhub>/port-ocean-gcp:<your_version>"
gcp_organization = "<your_gcp_organization>"
gcp_ocean_setup_project = "<your_gcp_project>"
gcp_included_projects = ["<your_gcp_project>"] # The Project list that the integration digests resources from.
integration_identifier = "gcp"
scheduled_resync_interval = 1440
event_listener = {
  type = "POLLING"
}
}' > main.tf
# Initializing Terraform and Providers
terraform init
# Creating the resources (Cloud Run, PubSub Topic + Subscription, Cloud Assets Feed, Service account + Role)
terraform apply
Configuration options
The Port GCP integration's Terraform module offers a set of configurations:
| Configuration | Default value | Required | Description |
|---|---|---|---|
port_client_id | True | The Port client id. | |
port_client_secret | True | The Port client secret. | |
gcp_organization | True | Your Google Cloud Organization Id. | |
gcp_ocean_setup_project | True | The Project ot create all the Integration's infrastructure (Topic, Subscription, Service account etc.) on. | |
gcp_ocean_integration_image | True | The Artifact Registry / Dockerhub image to deploy. | |
integration_identifier | True | The Integration's identifier in Port | |
port_base_url | 'https://api.getport.io' | False | The Port Base url. |
gcp_included_projects | [] | False | The Projects list you want the integration to collect from. If left empty, It will collect All projects in the organization. |
gcp_excluded_projects | [] | False | The Projects list you want the integration NOT to collect from. This will be overriden by any value in gcp_included_projects besides []. |
assets_types_for_monitoring | ["cloudresourcemanager.googleapis.com/Organization", "cloudresourcemanager.googleapis.com/Project", "storage.googleapis.com/Bucket", "cloudfunctions.googleapis.com/CloudFunction", "pubsub.googleapis.com/Subscription", "pubsub.googleapis.com/Topic"] | False | The list of asset types the integration will digest real-time events for. |
ocean_integration_service_account_permissions | ["cloudasset.assets.exportResource", "cloudasset.assets.listCloudAssetFeeds", "cloudasset.assets.listResource", "cloudasset.assets.searchAllResources", "cloudasset.feeds.create", "cloudasset.feeds.list", "pubsub.topics.list", "pubsub.topics.get", "pubsub.subscriptions.list", "pubsub.subscriptions.get", "resourcemanager.projects.get", "resourcemanager.projects.list", "resourcemanager.folders.get", "resourcemanager.folders.list", "resourcemanager.organizations.get", "cloudquotas.quotas.get", "run.routes.invoke", "run.jobs.run"] | False | The permissions granted to the integration's service_account. We recommend not changing it to prevent unexpected errors. |
assets_feed_topic_id | "ocean-integration-topic" | False | The name of the topic created to recieve real time events. |
assets_feed_id | "ocean-gcp-integration-assets-feed" | False | The ID for the Ocean GCP Integration feed. |
service_account_name | "ocean-service-account" | False | The name of the service account used by the Ocean integration. |
role_name | "OceanIntegrationRole" | False | The name of the role created for the Integration's Service account. |
gcp_ocean_integration_cloud_run_location | "europe-west1" | False | Location in which the Cloud Run will run. |
environment_variables | [] | False | List of environment variables set to the Cloud Run job. We recommend not changing this variable. |
initialize_port_resources | True | False | Boolean to initialize Port resources. |
event_listener | Polling | False | Port's event listener configurations. |
integration_version | "latest" | False | The version of the integration to deploy. |
integration_type | "gcp" | False | The type of the integration. |
scheduled_resync_interval | 1440 | False | The interval to resync the integration (in minutes). |
ocean_service_account_custom_roles | [] | False | A list of custom roles you want to grant the Integration's Service account. The module will grant these permissions to every available project and to the setup project gcp_ocean_setup_project. Example value: ["organizations/1234567890/roles/MyCustomRole", "organizations/1234567890/roles/MyOtherCustomRole"] |
Optional - Scaling the permissions
If you want the integration to collect resources from multiple projects/folders or to have it collect from the entire organization, you need to have permissions to create/view additional resources. Follow these instructions to make sure you are equipped with enough permissions.
- Make sure you are connected to your Organization.
- In the search text box, search for
roles. Click theIAM & Adminoption. - Click on
CREATE ROLE. - Click on
ADD PERMISSIONS, and select all the permissions from the above section - In the search text box, search for
manage resources. Click theIAM & Adminoption.
- In the
ResourcesTable, you see all projects+folders connected to your organization.
- Pick your desired scope (organization/folders/projects), using the left checkboxes.
- This will open up a menu on the right side.
-
Click on
ADD PRINCIPLE -
Here, Enter your's or your service account's email, and grant it your newly created
Role.
Further Examples
Refer to the examples page for practical configurations and their corresponding blueprint definitions.