ArgoCD
This page will walk you through the installation of the Port execution agent in your Kubernetes cluster using ArgoCD, utilizing its Helm Capabilities.
Prerequisites
- kubectl must be installed to apply your installation manifest.
- Helm must be installed to use the chart. Please refer to the Helm documentation for further details about the installation.
- ArgoCD must be installed in your Kubernetes cluster. Please refer to ArgoCD's documentation for further details about the installation.
- You will need your Port credentials.
- The connection credentials to Kafka are provided to you by Port.
- If you want to trigger a GitLab Pipeline, you need to have a GitLab trigger token
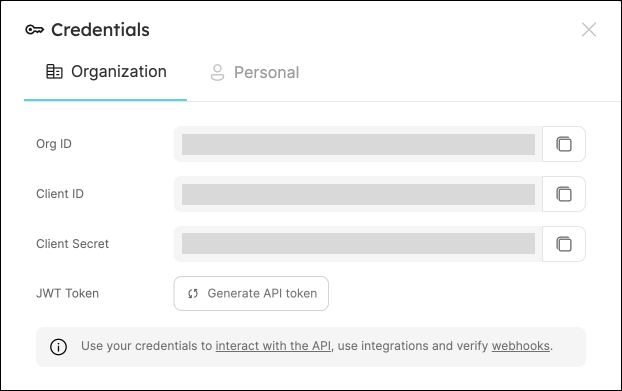
Get your Port credentials
To get your Port credentials, go to your Port application, click on the ... button in the top right corner, and select Credentials. Here you can view and copy your CLIENT_ID and CLIENT_SECRET:
Installation
- In your git repo, create a directory called
argocd.
mkdir argocd
- Inside your
argocddirectory create another directory for the current installation. For our example we usemy-port-agent.
mkdir -p argocd/my-port-agent
-
Create a
values.yamlfile in yourmy-port-agentdirectory, you can use it to override the helm chart values. Commit the changes to your git repository. -
Install the
my-port-agentArgoCD Application by creating the followingmy-port-agent.yamlmanifest:
Remember to replace the placeholders for YOUR_ORG_ID, YOUR_KAFKA_CONSUMER_GROUP, YOUR_PORT_CLIENT_ID YOUR_PORT_CLIENT_SECRET and YOUR_GIT_REPO_URL.
Multiple sources ArgoCD documentation can be found here.
ArgoCD Application
apiVersion: argoproj.io/v1alpha1
kind: Application
metadata:
  name: my-port-agent
  namespace: argocd
spec:
  destination:
    namespace: my-port-agent
    server: https://kubernetes.default.svc
  project: default
  sources:
  - repoURL: 'https://port-labs.github.io/helm-charts/'
    chart: port-agent
    targetRevision: 0.7.2
    helm:
      valueFiles:
        - $values/argocd/my-port-agent/values.yaml
      parameters:
        - name: env.normal.KAFKA_CONSUMER_GROUP_ID
          value: YOUR_KAFKA_CONSUMER_GROUP
        - name: env.normal.PORT_ORG_ID
          value: YOUR_ORG_ID
        - name: env.secret.PORT_CLIENT_ID
          value: YOUR_PORT_CLIENT_ID
        - name: env.secret.PORT_CLIENT_SECRET
          value: YOUR_PORT_CLIENT_SECRET
  - repoURL: YOUR_GIT_REPO_URL
    targetRevision: main
    ref: values
  syncPolicy:
    automated:
      prune: true
      selfHeal: true
    syncOptions:
    - CreateNamespace=true
- Apply your application manifest with
kubectl:
kubectl apply -f my-port-agent.yaml
Done! The exporter will begin creating and updating objects from your Kubernetes cluster as Port entities shortly.
Next Steps
- Refer to the usage guide to set up a self-service action that sends a webhook.
- Customize the payload mapping to control the payload sent to the target.