Self-hosted GitLab
If you use the self-hosted version of GitLab in your organization, you will need to use the Port execution agent to trigger your pipelines from Port.
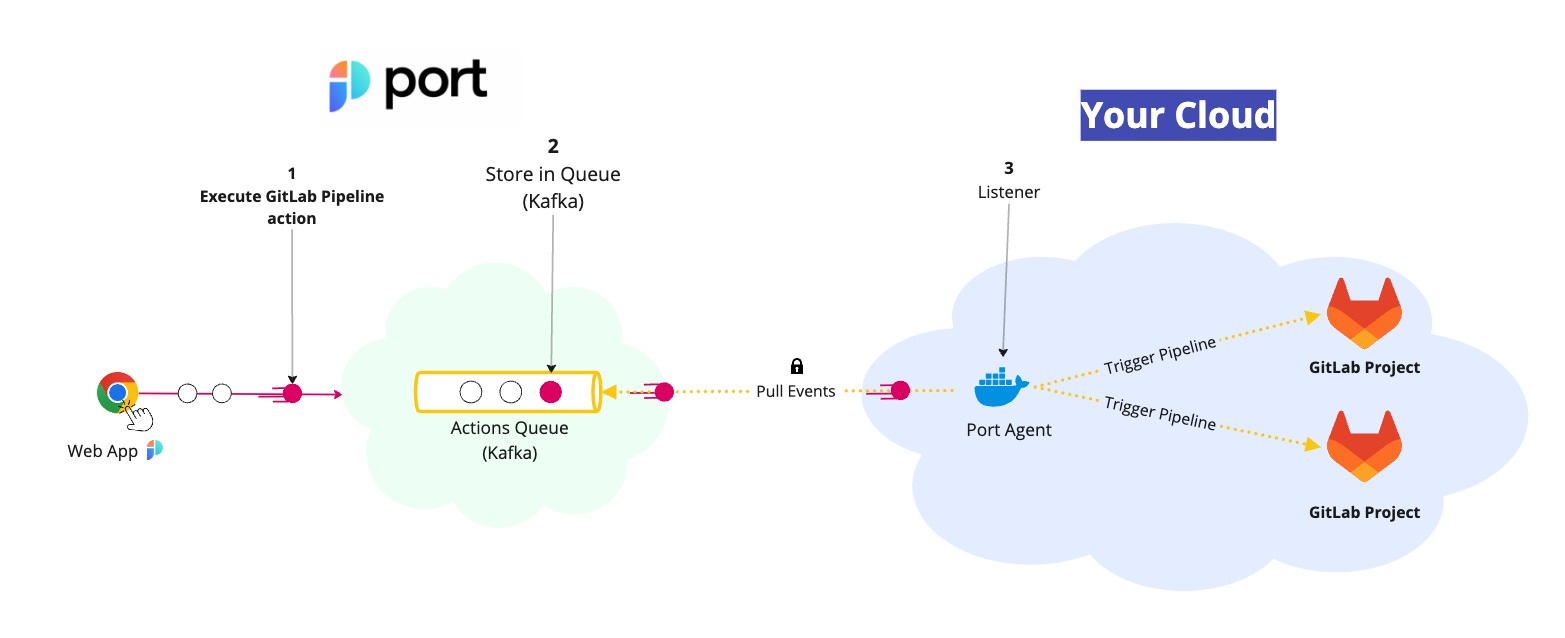
The steps shown in the image above are as follows:
- Port publishes an invoked
actionmessage containing the pipeline details to a Kafka topic. - A secure topic (
ORG_ID.runs) holds all the action invocations. - Port's execution agent pulls the new trigger event from your Kafka topic, and triggers your GitLab Pipeline.
This page will introduce the agent and guide you through the installation and configuration processes.
Prerequisites
- Connection credentials to Kafka are required. To obtain them, contact us via the intercom bubble in the bottom-right corner, or via our community Slack.
- Helm must be installed in order to install the relevant chart.
- In order to trigger a GitLab Pipeline, you need to have a GitLab trigger token.
To provide your trigger token to the agent, pass the helm chart an environment variable with a name that is the combination of the GitLab group and GitLab project, separated by an underscore (_). The name is case sensitive.
For example: group_project=token
You can load multiple trigger tokens, for different groups and projects in your GitLab environment.
Installing the agent
-
Add Port's Helm repo by using the following command:
helm repo add port-labs https://port-labs.github.io/helm-chartsEnsure you have the latest chartsIf you already added this repo earlier, run
helm repo updateto retrieve the latest versions of the charts.
You can then runhelm search repo port-labsto see the charts. -
Install the
port-agentchart using the following command:helm install my-port-agent port-labs/port-agent \
--create-namespace --namespace port-agent \
--set env.normal.PORT_ORG_ID=YOUR_ORG_ID \
--set env.normal.KAFKA_CONSUMER_GROUP_ID=YOUR_KAFKA_CONSUMER_GROUP \
--set env.secret.PORT_CLIENT_ID=YOUR_PORT_CLIENT_ID \
--set env.secret.PORT_CLIENT_SECRET=YOUR_PORT_CLIENT_SECRET \
--set env.secret.<YOUR GITLAB GROUP>_<YOUR GITLAB PROJECT>=YOUR_GITLAB_TOKEN \
--set env.normal.GITLAB_URL=YOUR_GITLAB_URLTo get your Port credentials, go to your Port application, click on the
...button in the top right corner, and selectCredentials. Here you can view and copy yourCLIENT_IDandCLIENT_SECRET: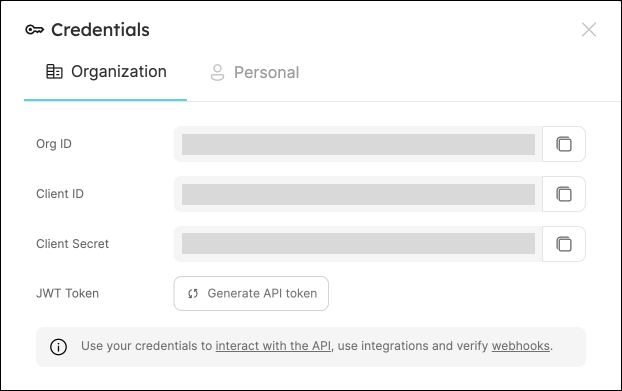
Done! Port's execution agent is now running in your environment and will trigger any GitLab pipeline that you have configured.
Configure the backend
Once the agent is installed, we can finish setting up the backend in Port.
-
Make sure that
Run Gitlab Pipelineis selected as the backend type. -
Now all we need is to provide the following details:
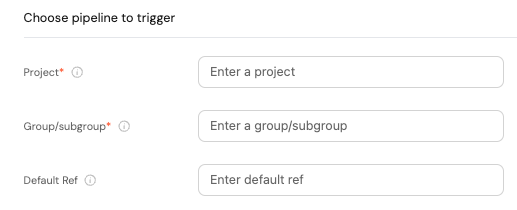
- Project - the name of the GitLab project.
The name can be obtained from your project URL:https://gitlab.com/GROUP/SUBGROUP/PROJECT. - Group/subgroup - the group and/or subgroup that the project belongs to.
Can also be obtained from the project URL:https://gitlab.com/GROUP/SUBGROUP/PROJECT. - Default ref - the branch/tag name we want the action/automation to use.
If you wish to create a self-service action or automation via Port's API, choose the gitlab backend type under the invocationMethod object.
Configure the payload
The payload is the data sent to the webhook URL every time the action/automation is executed. It is defined by the action/automation creator and can include any data that is needed by the GitLab pipeline.
When using the GitLab backend, the payload is defined under the pipelineVariables field.