Configure mapping
The mapping of an integration's data source defines the ingested data and its destination. It allows you to specify:
- Which data you wish to ingest from the integrated tool.
- Which properties in the integration's blueprints will be filled with the ingested data.
How does mapping work?
Integration mapping is configured in the data sources page of your portal, under Exporters.
Each integration has its own mapping, written in YAML.
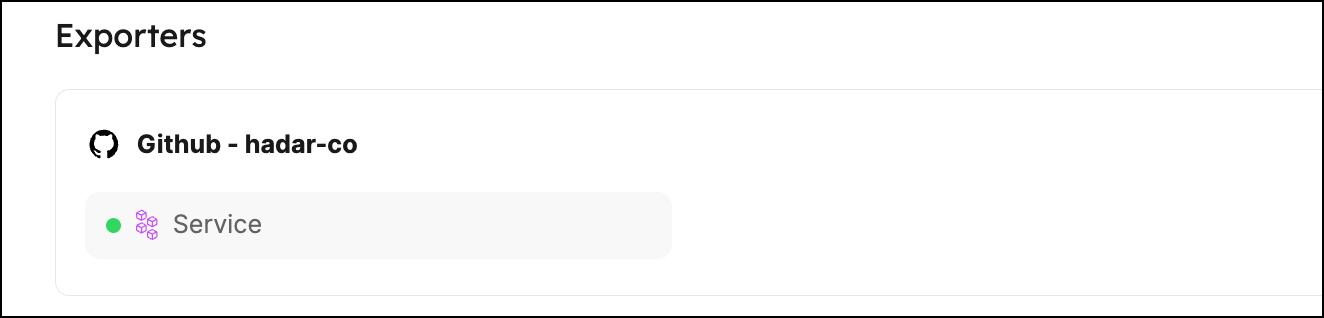
To understand how mapping works, let's take a look at an example. After you complete the onboarding and connect your Git provider to Port, you will see an exporter entry in your data sources page:
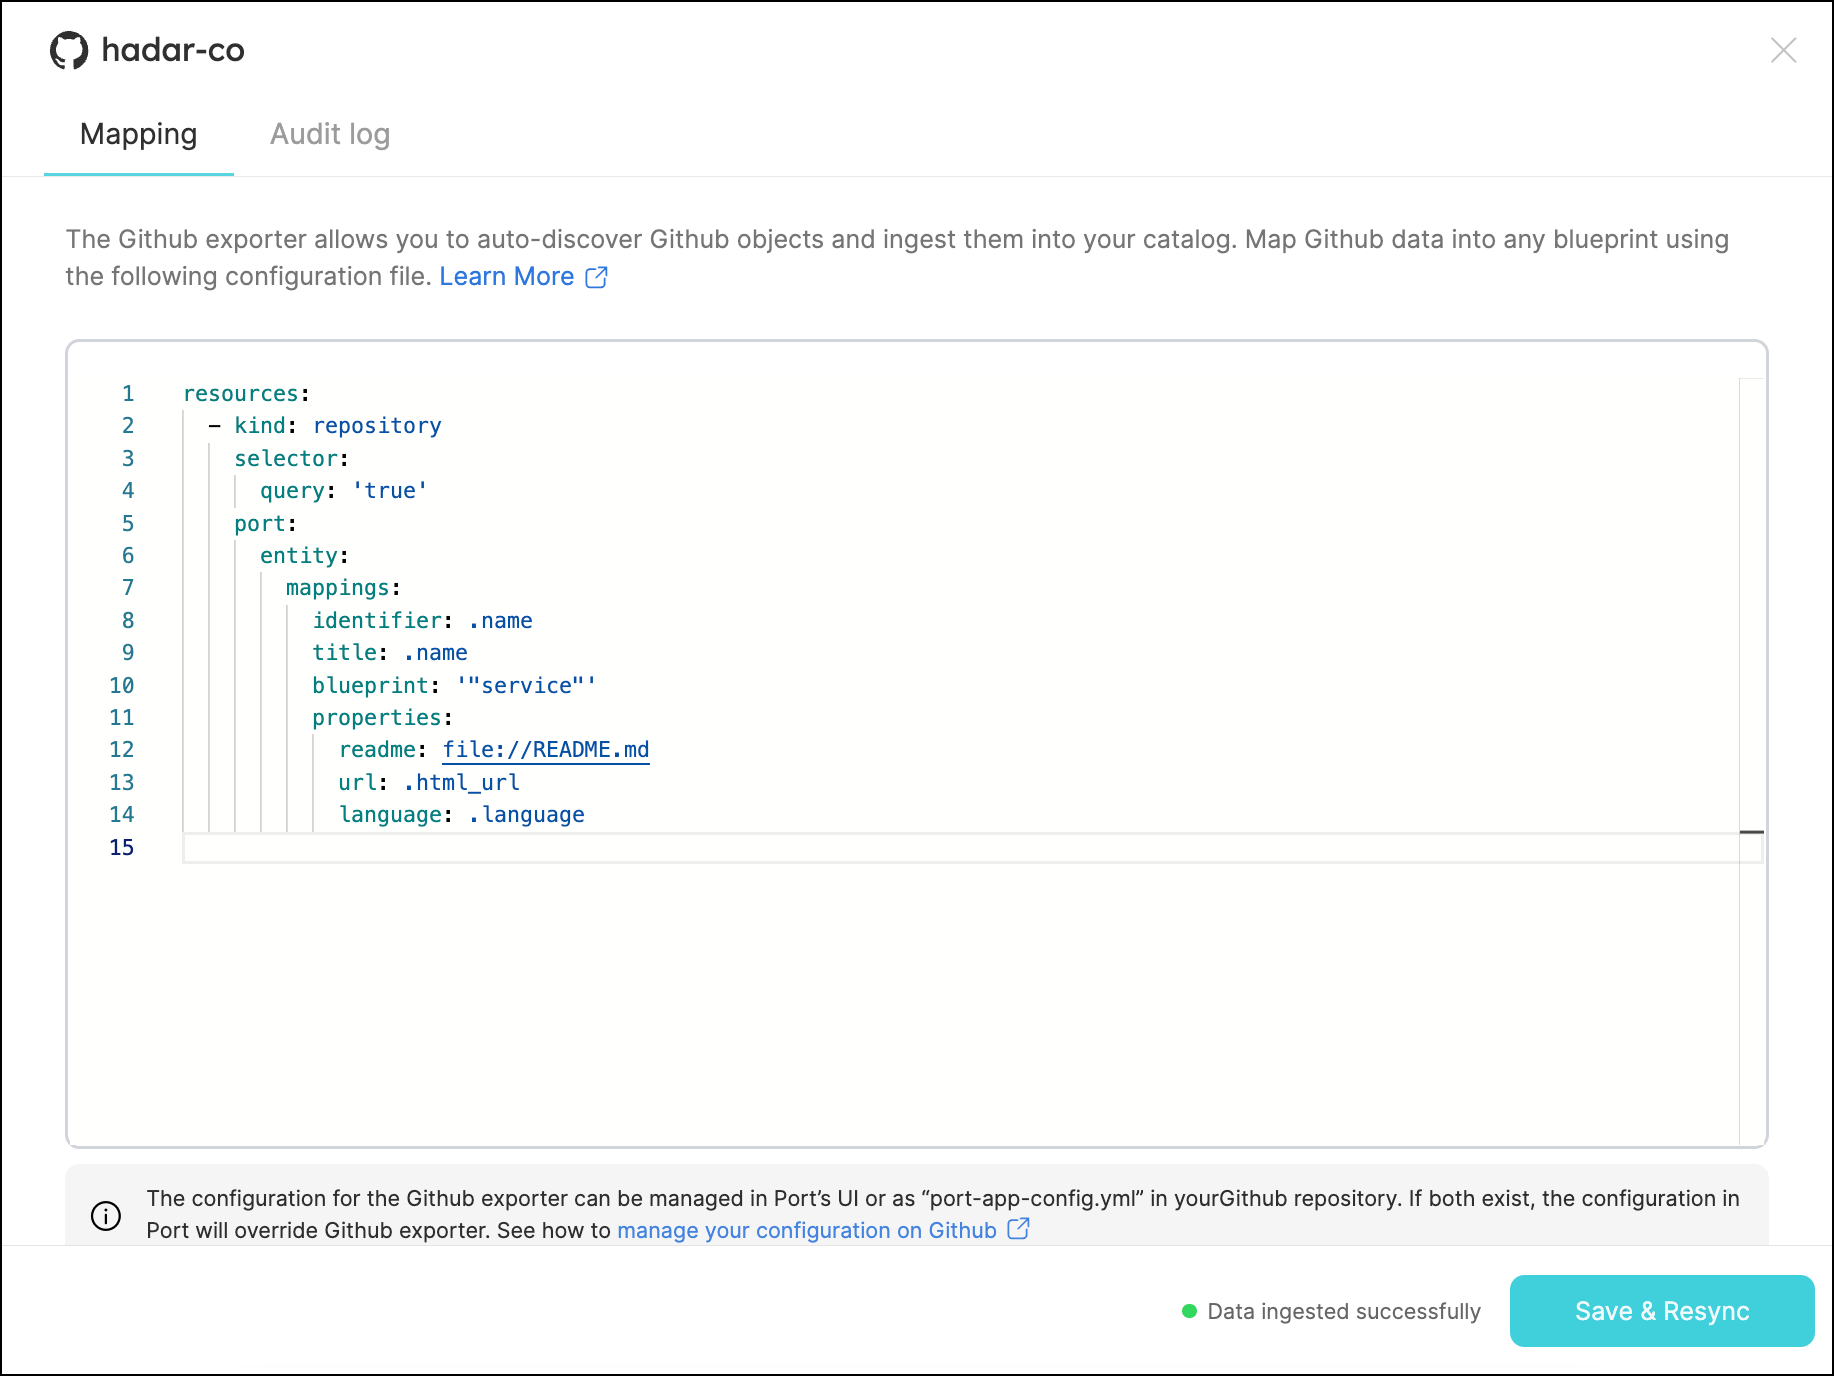
Clicking on this entry will open the mapping configuration. In the bottom left panel, you will see the YAML configuration of the mapping.
Note that Port provides default mapping, providing values to the properties defined in the relevant blueprint:
Configuration structure
This section will explain each part of the configuration YAML.
Some of the keys use JQ queries to filter the data ingested from the tool's API.
-
The
resourceskey is the root of the YAML configuration:resources:
- kind: repository
...
-
The
kindkey is a specifier for the object you wish to map from the tool's API (in this example, a Github repository).
To see whichkindsare available for mapping, refer to the integration's documentation. In this example, the available kinds are listed in the Github integration page.resources:
- kind: repository
selector:
...
-
The
selectorand thequerykeys let you filter exactly which objects of the specifiedkindwill be ingested into Port:resources:
- kind: repository
selector:
query: "true" # JQ boolean query. If evaluated to false - skip syncing the object.
port:Using a JQ query, you can define your desired conditions. For example, to ingest only repositories that have a name starting with
"service", use thequerykey like this:query: .name | startswith("service")
-
The
port.entity.mappingskey contains the section used to map the object fields to Port entities.
Here you can specify theblueprintin Port to which the data should be mapped, and which API object will be ingested to each of its properties.resources:
- kind: repository
selector:
query: "true"
port:
entity:
mappings: # Mappings between one GitHub API object to a Port entity. Each value is a JQ query.
identifier: ".name"
title: ".name"
blueprint: '"service"'
properties:
description: ".description"
url: ".html_url"
defaultBranch: ".default_branch"To create multiple mappings of the same kind, you can add another item to the
resourcesarray:resources:
- kind: repository
selector:
query: "true"
port:
entity:
mappings: # Mappings between one GitHub API object to a Port entity. Each value is a JQ query.
identifier: ".name"
title: ".name"
blueprint: '"service"'
properties:
description: ".description"
url: ".html_url"
defaultBranch: ".default_branch"
- kind: repository # In this instance repository is mapped again with a different filter
selector:
query: '.name == "MyRepositoryName"'
port:
entity:
mappings: ...
Additional options
Several more advanced options are available in the mapping configuration:
-
createMissingRelatedEntities- used to enable the creation of missing related entities in Port. This is useful when you want to create an entity and its related entities in one call, or if you want to create an entity whose related entity does not exist yet. -
deleteDependentEntities- used to enable deletion of dependent Port entities. This is useful when you have two blueprints with a required relation, and the target entity in the relation should be deleted. In this scenario, the delete operation will fail if this parameter is set tofalse. If set totrue, the source entity will be deleted as well.
To use these options, add them to the root of the mapping configuration:
createMissingRelatedEntities: true
deleteDependentEntities: true
resources:
  - kind: repository
    ...
Test your mapping - JQ playground
The mapping configuration window contains a JQ playground that allows you to test your JQ queries against example responses from the API of the integrated tool. This is useful for validating your queries and ensuring they return the expected results.
For integrations based on the Ocean framework, examples will be automatically generated for each resource kind in your mapping, based on real data ingested from the tool. You can disable this behavior by setting the sendRawDataExamples flag to false in the integration's configuration.
To test your mapping against the example data, click on the Test mapping button in the bottom-right panel.
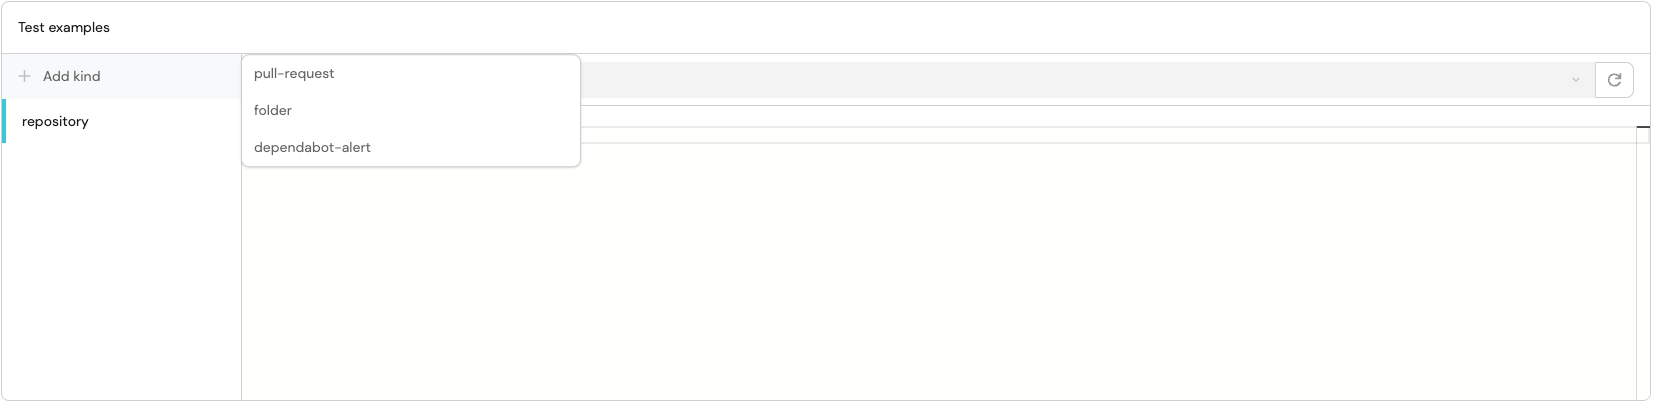
Manually add test examples
For each resource kind in your mapping (in the bottom-left panel), you can add an example in the Test examples section.
Click on the Add kind button to add an example:
After adding your example, click on the Test mapping button in the bottom-right panel to test your mapping against the example data.
In addition to the aforementioned JQ playground, Port provides a general JQ playground where you can test any JSON snippet against JQ expressions with real-time filters and AI-powered assistance.
Edit an integration's mapping
Once you have configured an integration's mapping to your liking, click the Resync button in the bottom-right to save your changes.
To edit an integration's mapping using Port's API, you can use the Patch integration route.
To perform a simple resync of an integration via the API without changing its mapping, use the same Patch integration route with the integration identifier and an empty body.
Mapping relations
You can use the mapping YAML file to set the value of a relation between entities. This is very useful when you want to automatically assign an entity to the relation of another entity using a convention of your choice.
For example, say we have a service blueprint and a PagerDuty Service blueprint with a relation between them:

After ingesting all of our services and PagerDuty services, we want to connect each service to its corresponding PagerDuty service. To achieve this, we have two options:
-
Option 1 - use the integration's mapping YAML. In our example, we can add an entry to the mapping of the PagerDuty integration:
-
Go to your data sources page and click on the PagerDuty exporter:

-
Add the following entry to the mapping YAML:
- kind: services
  selector:
    query: "true"
  port:
    entity:
      mappings:
        identifier: .name
        blueprint: '"service"'
        properties: {}
        relations:
          pagerduty_service: .id
Now, if a
service'sidentifier is equal to aPagerDuty service'sname, that service will automatically have its on-call property filled with the relevant PagerDuty service.
This is just the convention we chose for this example, but you can use a different one if you'd like.
-
-
Option 2 - manually assign a PagerDuty service to each service using the UI:
-
Go to the Services page of your software catalog.
-
Choose a service you want to assign a PagerDuty service to. Hover over it, click on the
...button on the right, and selectEdit. -
In the
PagerDuty servicefield, select the relevant PagerDuty service from the dropdown list, then clickUpdate: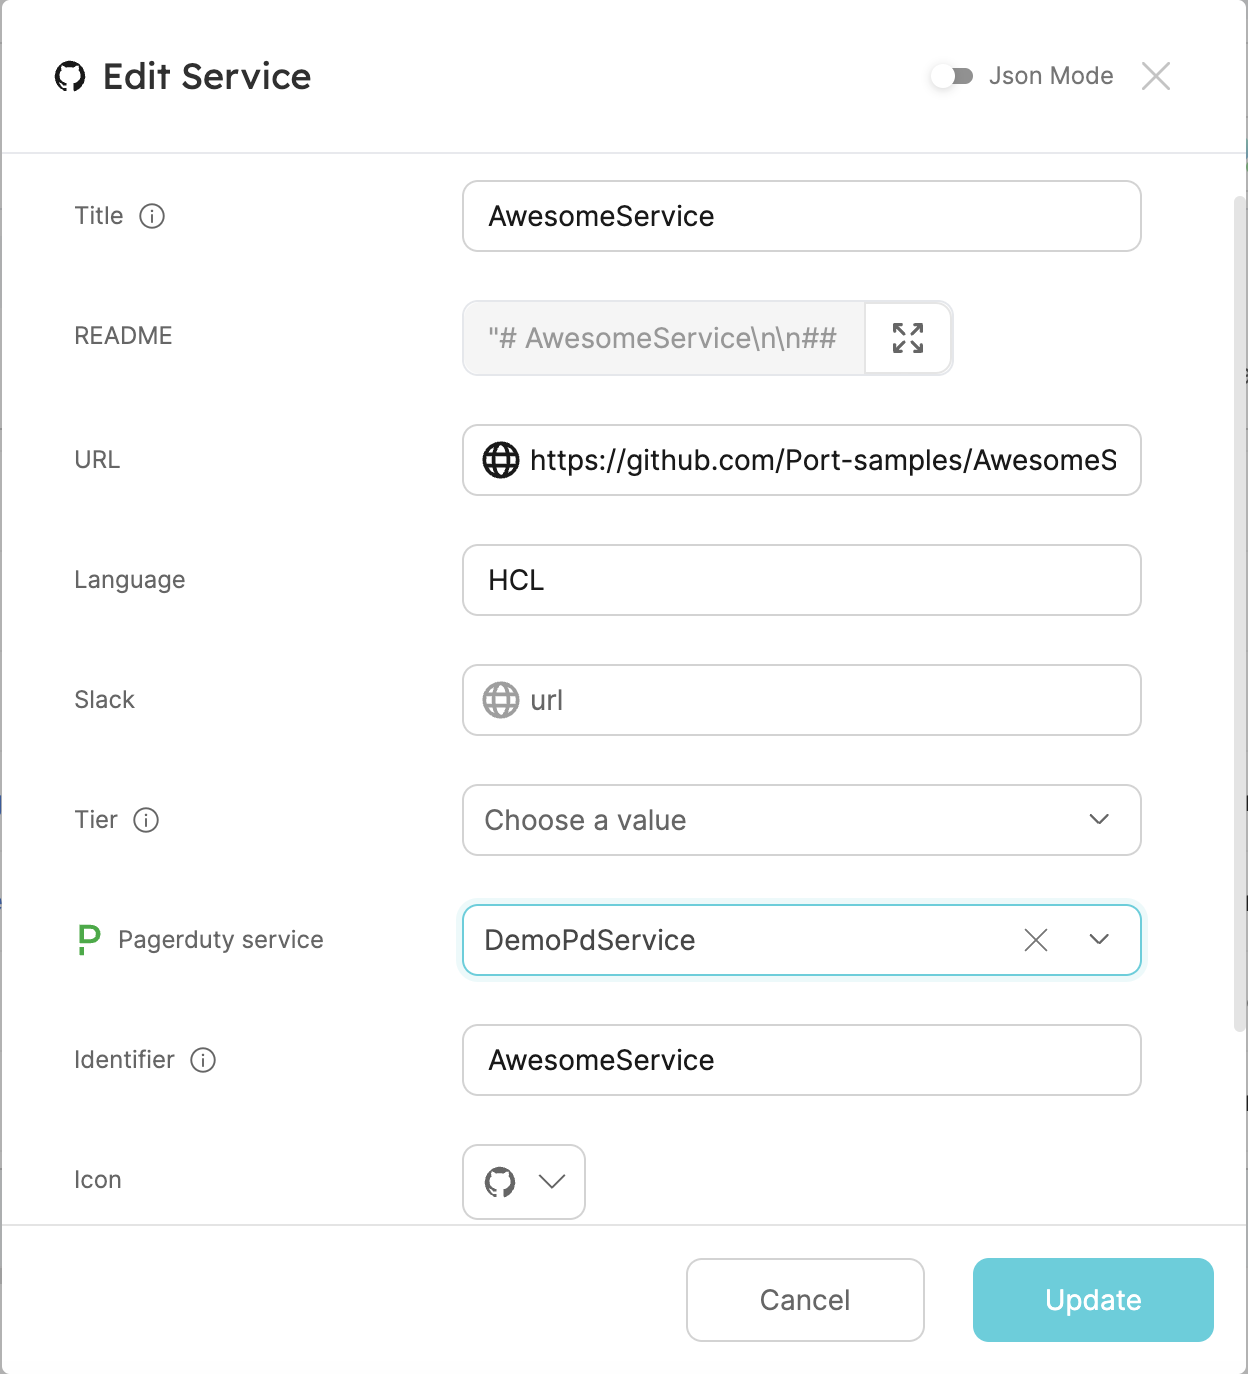
-
Mapping relations using search queries
In the example above we map a relation using a direct reference to the related entity's identifier.
Port also allows you to use a search query rule to map relations based on a property of the related entity.
This is useful in cases where you don't have the identifier of the related entity, but you do have one of its properties.
For example, consider the following scenario:
Say we have a service blueprint that has a relation (named service_owner) to a user blueprint. The user blueprint has a property named github_username.
Now, we want to map the service_owner relation based on the github_username property of the user entity.
To achieve this, we can use the following mapping configuration:
- kind: repository
  selector:
    query: 'true'
  port:
    entity:
      mappings:
        identifier: .name
        title: .name
        blueprint: '"service"'
        relations:
          service_owner:
            combinator: '"and"'
            rules:
              - property: '"github_username"'
                operator: '"="'
                value: .owner.login
Instead of directly referencing the user entity's identifier, we use a search query rule to find the user entity whose github_username property matches the .owner.login value returned from GitHub's API.
When using a search query rule to map a relation, Port will query all entities of the related blueprint (in this case - user) and return the one/s that match the rule.
Limitations
- One or more entities can be returned by the search query rule. Note the relation's type when using this method:
- A "single type" relation expects a single entity to be returned.
- A "many type" relation expects an array of entities to be returned.
- The maximum number of entities returned by the search query rule is 100.
- Mirror and calculation properties are currently not supported.
- Only the
=andinoperators are supported for the search query rule.
Map by property
In some cases, we may not know the identifier of the entity we want to map to. If that entity has a property that we do know, we can use it to map the data.
This is especially useful when patching entities whose identifiers are not known in advance. Take the following example:
- Say we installed Port's PagerDuty integration, and we want to connect each
service(Git repository) to the relevantPagerDuty service. - We can create a property in our
serviceblueprint namedpagerduty_service_id, containing the identifier of the relevant PagerDuty service. - Then, in the
PagerDutyintegration mapping, we can use this property to map eachPagerDuty serviceto the relevantservice. - This way, we would not need to have a separate blueprint for
PagerDuty services, since the integration maps directly to theserviceblueprint.
Mapping by property is done using a search query rule in the following format:
resources:
  - kind: services
    selector:
      query: 'true'
    port:
      entity:
        mappings:
          identifier:
            combinator: '"and"'
            rules:
              - operator: '"="'
                property: '"pagerduty_service_id"'
                value: .id
          blueprint: '"service"'
          properties:
            oncall: .__oncall_user | sort_by(.escalation_level) | .[0].user.email
            ... # Any other properties you want to map
In the example above, we search for a service entity whose pagerduty_service_id property is equal to the id of the PagerDuty service, and map data from the PagerDuty service to it.
Searching by property can also be used when using Port's API to create an entity.
Limitations
- The search query must return exactly one entity (else the entire request will fail).
- The query will be executed on the same blueprint from the request’s url.
- Only the
=andinoperators is supported for the search query rule. Calculationandmirrorproperties are not supported.
Create multiple entities from an array API object
In some cases, an application's API returns an array of objects that you want to map to multiple entities in Port.
To achieve this, Port provides you with the itemsToParse key, its value should be a JQ query that returns an array.
In order to reference an array item attribute, use .item in your JQ expression.
Here is an example mapping configuration of a Jira issue, where we want to map each of the issue's comments to a separate comment entity:
- kind: issue
  selector:
    query: .item.name != 'test-item' and .issueType == 'Bug'
  port:
    itemsToParse: .fields.comments
    entity:
      mappings:
        identifier: .item.id
        blueprint: '"comment"'
        properties:
          text: .item.text
        relations:
            issue: .key
The object returned from Jira for which we would apply this mapping might look like this (note the comments array):
Example Jira API response (click to expand)
{
  "url": "https://example.com/issue/1",
  "status": "Open",
  "issueType": "Bug",
  "comments": [
    {
      "id": "123",
      "text": "This issue is not reproducing"
    },
    {
      "id": "456",
      "text": "Great issue!"
    }
  ],
  "assignee": "user1",
  "reporter": "user2",
  "creator": "user3",
  "priority": "High",
  "created": "2024-03-18T10:00:00Z",
  "updated": "2024-03-18T12:30:00Z",
  "key": "ISSUE-1"
}
Common use-cases
Splitting a kind block
Sometimes the CreateRelatedMissingEntities flag is passed as false to prevent generation of additional entities for relations. This can lead to cases where entity ingestion will not happen because the target entity for a relation does not exist in your catalog.
To handle such cases, you can split a single kind to multiple mappings like this:
createMissingRelatedEntities: false
  - kind: services
    selector:
      query: "true"
    port:
      entity:
        mappings:
          identifier: .name
          blueprint: '"service"'
          properties:
            #Properties mapping
  - kind: services
    selector:
      query: "true"
    port:
      entity:
        mappings:
          identifier: .name
          blueprint: '"service"'
          properties: {}
          relations:
            pagerduty_service: .id
Looking at this mapping configuration we see the following:
- The first
kindblock is used to create the entity along with all of its properties. - The second
kindblock is used to update the same entity (notice the mapping for the identifier is the same in both configurations) with relations. If the target entity of the relation does not exist (i.e. you have no matching PagerDuty service), the update itself will fail, but the data ingestion will still complete successfully.
This case can also be expanded for handling multiple relation, for each relation that might not be established, you can split it into another kind mapping.