Port Roles & User management
Port's RBAC mechanism makes it possible to assign permissions to specific users and teams, as well as configure custom roles tailored to the needs of the different personas in Port.
Assigning permissions
In Port, you can assign permissions by using roles, team ownership and users.
Roles
There are 3 types of roles. Below are their out-of-the-box permissions:
| Role | Description |
|---|---|
| Admin | Perform any operation on the platform |
| Moderator of a Blueprint | Perform any operation on a specific blueprint and its entities. A user can be a moderator of multiple blueprints |
| Member | Read-only permissions + permissions to execute actions |
The Moderator role is automatically created during blueprint creation.
For example, creating the blueprint Env will generate a role named Env-moderator, which can perform any operation on the Env blueprint and its entities.
Hierarchy
In addition to the permissions designated for each role, permissions are also inherited based on the following hierarchy:
Admin > Moderator > Member
For example, if Members are allowed to edit Cluster entities, then Microservices Moderators are also allowed to edit them (Admins can edit all entities under all blueprints).
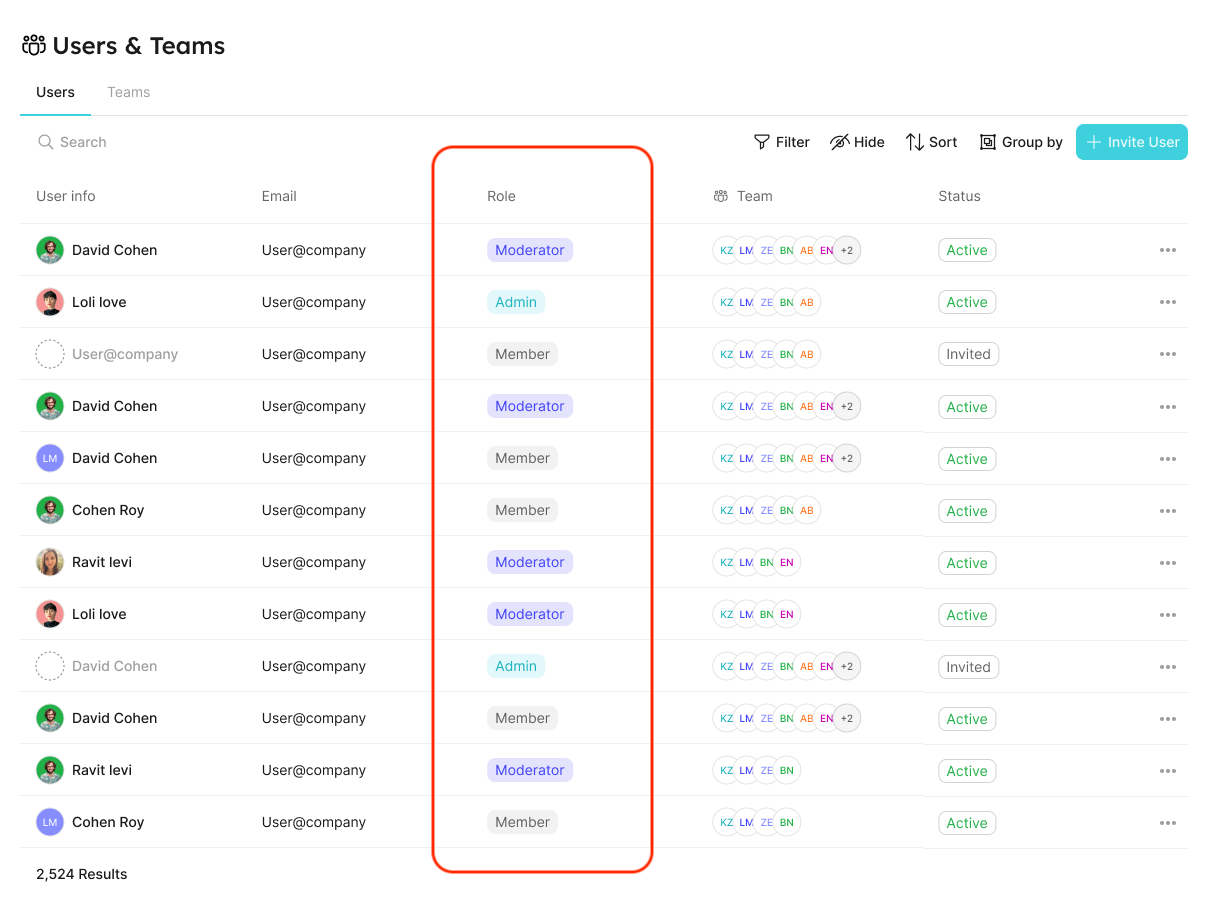
You can view (and edit) each user’s role in the users table:

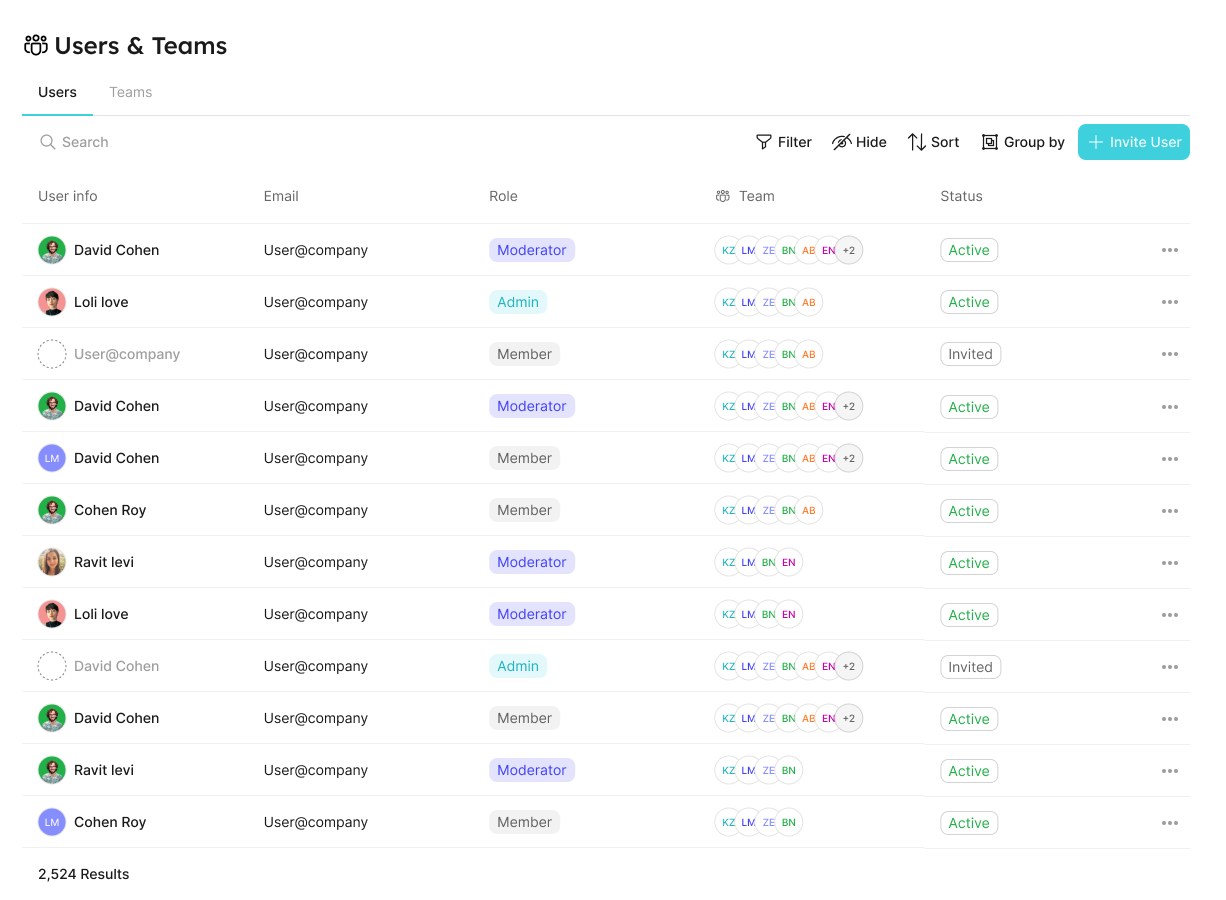
Refer to the Users and Teams section for more information about the users page
Users and Teams management
In Port, you can control and manage all your users and teams, in one place.
This allows admins to:
- Invite users to their organization and assign them specific roles and teams.
- Manage teams and their members.
- Promote ownership of assets within the organization (with team assignments).
- Set granular permissions on the portal (permission management).
It will also benefit developers, who could:
- Know what software assets they own and are responsible for.
- View and perform actions on their assets, according to their role and team.
Each user is defined by the following properties:
- Basic information - image, name, and email.
- Role - the user’s permissions level (see the set catalog RBAC section);
- Teams - a
teamis a group of users that owns Entities (see the team section).
Users and teams can be managed via:
- The Users & Teams page
- Port's Terraform provider
- The Port API
Users & Teams Page

Users tab
In the users tab, you can:
- View all users.
- Invite new users.
- Edit users.
- Delete users.
Teams tab
In the teams tab, you can:
- View all teams.
- Create new teams.
- Edit teams.
- Delete teams.
Note: the following limitations do not apply to teams created manually inside Port.
When Single Sign-On (SSO) is enabled, users and teams information (including team membership) is taken directly from your identity provider (IdP).
Since those teams are synced from your IdP the following actions cannot be performed on them:
- Edit SSO team membership;
- Delete SSO teams.
If you try to perform one of the disabled actions, the interface will display an explanation:

Terraform provider
You can perform the aforementioned actions via the Terraform provider.
Here is a basic example of a main.tf file that defines a team with 3 users:
resource "port_team" "example" {
  name        = "example"
  description = "example"
  users = [
    "user1@test.com",
    "user2@test.com",
    "user3@test.com",
  ]
}
You can browse the team schema here.
Port API
The API allows you to manage teams and users.
Team meta property
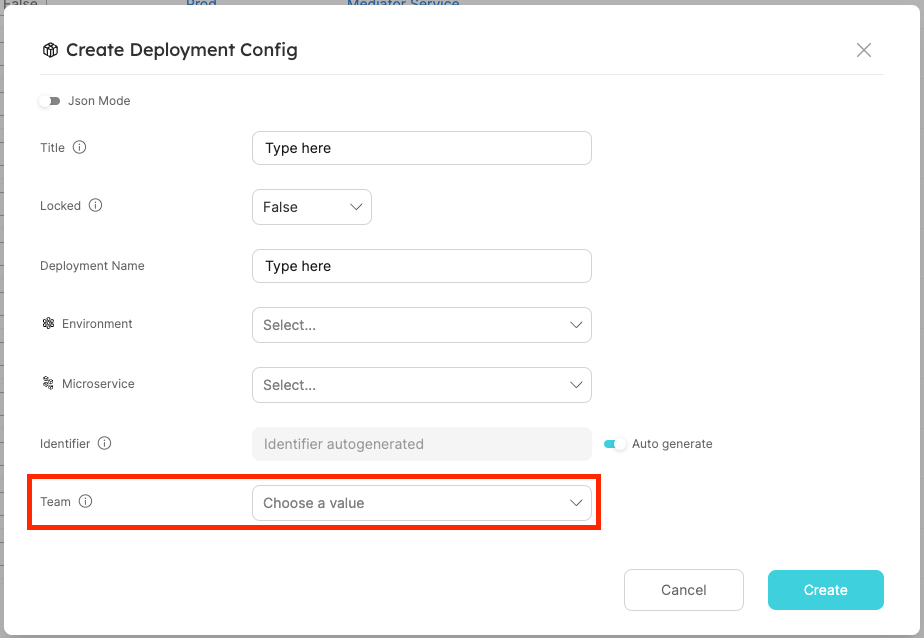
Each entity has a meta-property called team, that allows you to set which team owns the entity. As an admin, you can also set blueprint permissions according to this field.
Entity JSON example with team field:
{
  "identifier": "unique-ID",
  "title": "Entity Title",
  "team": [],
  "blueprint": "testBlueprint",
  "properties": {
    "prop1": "value"
  },
  "relations": {}
}
Team dropdown selector in the entity create/edit page:

| Field | Type | Description | Default |
|---|---|---|---|
| team | List | System field that defines the team that owns an Entity | "team": [] |
- We support the manual creation of teams on Port, as well as integrating with identity providers, such as Okta and AzureAD, to import existing teams.
- When users log in to Port, their groups will be pulled automatically from their identity provider, and the allowed team values will be updated accordingly.
- It is also possible to configure team inheritance and utilize relations to auto-populate the
teamkey of entities.
Okta and AzureAD integrations are only available after configuring SSO from the relevant identity provider, refer to the Single Sign-On (SSO) section for more details
Users and teams as blueprints
This capability is currently in beta, and is still undergoing final testing before its official release.
Should you encounter any bugs or functionality issues, please let us know so we can rectify them as soon as possible.
Your help is greatly appreciated! ⭐
Port allows you to manage users and teams as blueprints.
This option is disabled by default, and can be enabled via Port's API.
After enabling this option, two new blueprints will be created in your data model - User and Team.
These blueprints represent Port users and teams, and their data will be synced accordingly:
- When you create a user/team entity, a matching Port user/team will be created as well.
- When you delete a user/team entity, the matching Port user/team will be deleted as well.
The syncing mechanism is bidirectional, meaning that every create/edit/delete action performed on a user/team will be reflected in the entities as well.
Why manage users and teams as blueprints?
With this powerful feature you can accomplish the following:
- Enrich your users and teams data by adding properties to these blueprints - Slack URLs, titles, profiles, or any other data.
- Enrich your users and teams data by adding relations to these blueprints - for example, you can relate a user to a domain, or a team to a project.
- As with all other blueprints, you can ingest data into your entities using an integration. For example, you can map your GitHub users into Port users via your GitHub integration configuration.
The User and Team blueprints cannot be deleted or edited, and their default properties cannot be changed.
You can, however, create new properties and relations in them and edit/delete them as you wish.
Enable option
To enable management of users and teams as blueprints, send a POST request to a designated endpoint:
- Go to your Port application, click on the
...button in the top right corner, and selectCredentials. - Click on the
Generate API tokenbutton, and copy the generated token.
curl -L -X POST 'https://api.getport.io/v1/blueprints/system/user-and-team' \
-H 'Authorization: <YOUR_BEARER_TOKEN>'
Port exposes two API instances, one for the EU region of Port, and one for the US region of Port.
- If you use the EU region of Port (https://app.getport.io), your API URL is
https://api.getport.io. - If you use the US region of Port (https://app.us.getport.io), your API URL is
https://api.us.getport.io.
Blueprints Structure
The new blueprints have the following structure:
- User
- Team
- Identifier - the user's email. Will be synced with the Port user's email.
- Title - the user's name. This will be synced with the Port user's first and last name.
- Status - the user's status, which can be one of the following:
- Active - the user has logged into Port .
- Invited - the user was invited to Port via an invitation email.
- Disabled - the user is disabled and cannot use Port (relevant only for service accounts).
- Port Role - the user's internal role in Port. This property affects the permissions granted to this user.
- Moderated Blueprints - the blueprints that can be moderated by the user. Only relevant for
moderatorusers. - Port type - the type of the user, can be one of the following:
- Standard - human users.
- Service Account.
- Identifier - the team's identifier.
- Title - the team's name. This will be synced with the Port team name.
- Description - the team's description. This will be synced with the Port team description.
- Size - the number of users in the team.
Consequent changes
After enabling this feature, some functionalities will be affected:
-
Any search query that includes
$teamwill use the team'sidentifierinstead of itsname.
For example:{
"operator": "containsAny",
"property": "$team",
"value": ["team-identifier"] // instead of ["team-name"]
}This change will affect all search queries that include the
$teamproperty, in any component (widget filters, entity search, dynamic permissions, etc.).
Note that the getUserTeams() function will automatically return the team'sidentifier, so it can be used as is. -
In Advanced input configurations of self-service actions, when using a jqQuery, team identifiers should be used instead of team names.
Also, when using.userin the jqQuery, you have access any of the user's properties and/or relations.
For example:{
"properties": {
"namespace": {
"type": "string",
"format": "entity",
"blueprint": "namespace",
"dataset": {
"combinator": "and",
"rules": [
{
"property": "$team",
"operator": "containsAny",
"value": {
"jqQuery": "[.user.relations.teams[].identifier]" // instead of [.user.teams[].name]
}
}
]
}
}
}
} -
In dynamic permissions of self-service actions, under the
rulesand/orconditionskeys, you can access the entire user object, including its properties and relations.
For example:{
"policy": {
"queries": {
"search_entity": {
"rules": [
{
"value": "service",
"operator": "=",
"property": "$blueprint"
},
{
"value": "{{ .inputs.name }}",
"operator": "=",
"property": "$identifier"
}
],
"combinator": "and"
}
},
"conditions": [
".user.properties.role == \"Manager\""
]
}
}
Service Accounts
Service accounts are non-human users (bots) that can be used for integrating external tools and automating daily tasks using Port.
For example - creating a Slack bot that can execute Port self service actions.
Create a service account
Creating service accounts requires enabling Users and Teams as blueprints, and is currently only available via Port's API.
To create a new service account, all you need to do is create a new user entity using the Create Entity API endpoint with the value of Service Account in the port_type property.
Creating a service account has two limitations:
- The new service account email domain must be
serviceaccounts.getport.io. For examplemy-new-service-account@serviceaccounts.getport.io - The
statusproperty of the new service account must beActive.
Full example (click to expand)
curl -L -X POST 'https://api.getport.io/v1/blueprints/_user/entities' \
-d '{
    "identifier": "my-new-service-account@serviceaccounts.getport.io",
    "title": "My New Service Account",
    "blueprint": "_user",
    "icon": "User",
    "properties": {
        "port_type": "Service Account",
        "port_role": "Member",
        "status": "Active"
    },
    "relations": {}
}' \
-H 'content-type: application/json' \
-H 'Authorization: <YOUR API TOKEN>'
Using The Service Account
When creating a new service account entity you might notice a new section in the response body named additional_data. Inside this section you can find the new service account credentials you can use to authenticate against Port's API.
These credentials will not appear anywhere else. Make sure you keep it in a secure place and share them only with people in your organization.
To use Port's API with the new service account, you can generate an API access token with the credentials using the Create Access Token API endpoint. With the generated token you can use any of the API endpoints as the new service account.
Full response (click to expand)
{
    "ok": true,
    "entity": {
        "identifier": "my-new-service-account@serviceaccounts.getport.io",
        "title": "My New Service Account",
        "icon": "User",
        "blueprint": "_user",
        "team": [],
        "properties": {
            "port_type": "Service Account",
            "port_role": "Member",
            "status": "Active"
        },
        "relations": {},
        "createdAt": "2024-09-21T08:56:38.062Z",
        "createdBy": "",
        "updatedAt": "2024-09-21T08:56:38.062Z",
        "updatedBy": ""
    },,
    "additionalData": {
        "credentials": {
            "clientId": "<YOUR SERVICE ACCOUNT CLIENT ID>",
            "clientSecret": "<YOUR SERVICE ACCOUNT CLIENT SECRET>"
        }
    }
}
Service account permissions
Port service accounts are treated like any other users and extend the same RBAC mechanism. This means that you can define roles for them (Member, Admin, etc.) or add them to teams and they will be granted the relevant permissions accordingly.
Disabling service accounts
Service accounts can easily be disabled at any time. To disable a service account, update it's status property to Disabled.
Disabled service accounts can no longer generate new API tokens or use existing ones. Disabled service accounts can be re-enabled at any time by updating the status property back to Active.