How to configure Azure AD
Follow this step-by-step guide to configure the integration between Port and Azure AD using a SAML application
In order to complete the process you will need to contact us to receive the information you require, as well as the information Port requires from you. All is elaborated below in the following section.
Port-AzureAd integration benefits
- Connect to the Port application via an AzureAD app.
- Your AzureAD teams will be automatically synced with Port upon a user sign-in.
- Set granular permissions on Port according to your AzureAD groups.
Register a new application and generate the required credentials
- Head to your Azure portal and enter the Entra ID portal.
- Click on
Enterprise Applicationsand create a new application. - Click on
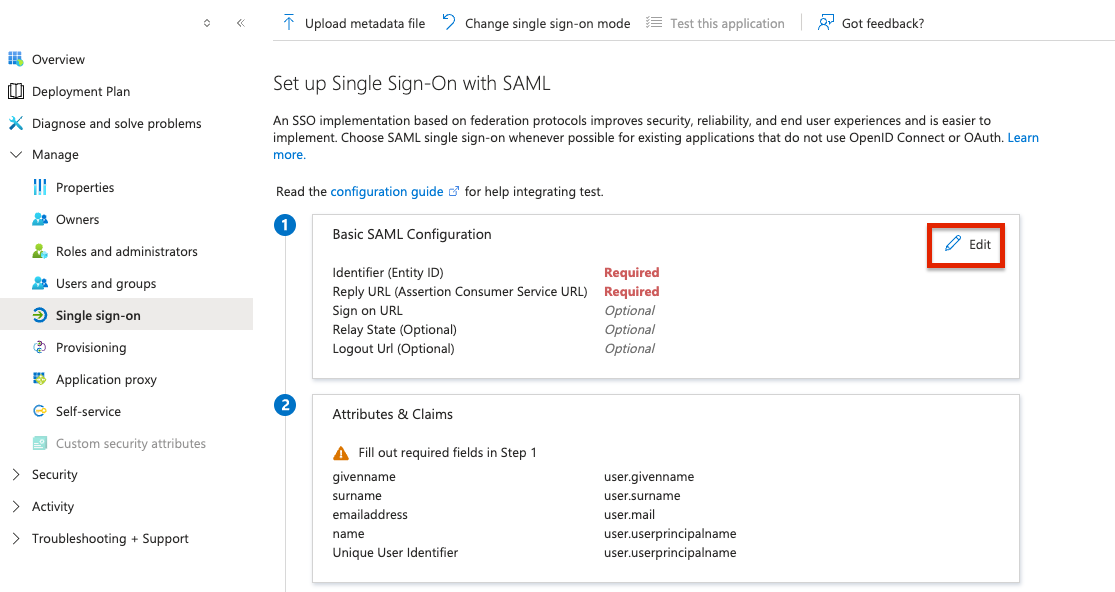
Create your own applicationand selectIntegrate any other application you don't find in the gallery (Non-gallery). - In the getting started section, select the
Set up Single Sign Onbutton, and choose the SAML method. - Edit the Basic SAML Configuration (step 1) and add the following information (Reach out to Port to receive your
{CONNECTION_NAME}value):
- Identifier (Entity ID):
urn:auth0:port-prod:{CONNECTION_NAME} - Reply URL (Assertion Consumer Service URL):
https://auth.getport.io/login/callback?connection={CONNECTION_NAME} - Logout URL (This is optional):
https://auth.getport.io/logout
- Identifier (Entity ID):
The details listed are for organizations hosted in EU.
For US, you will need to use https://auth.us.getport.io/login/callback?connection={CONNECTION_NAME} and https://auth.us.getport.io/logout.
- Under
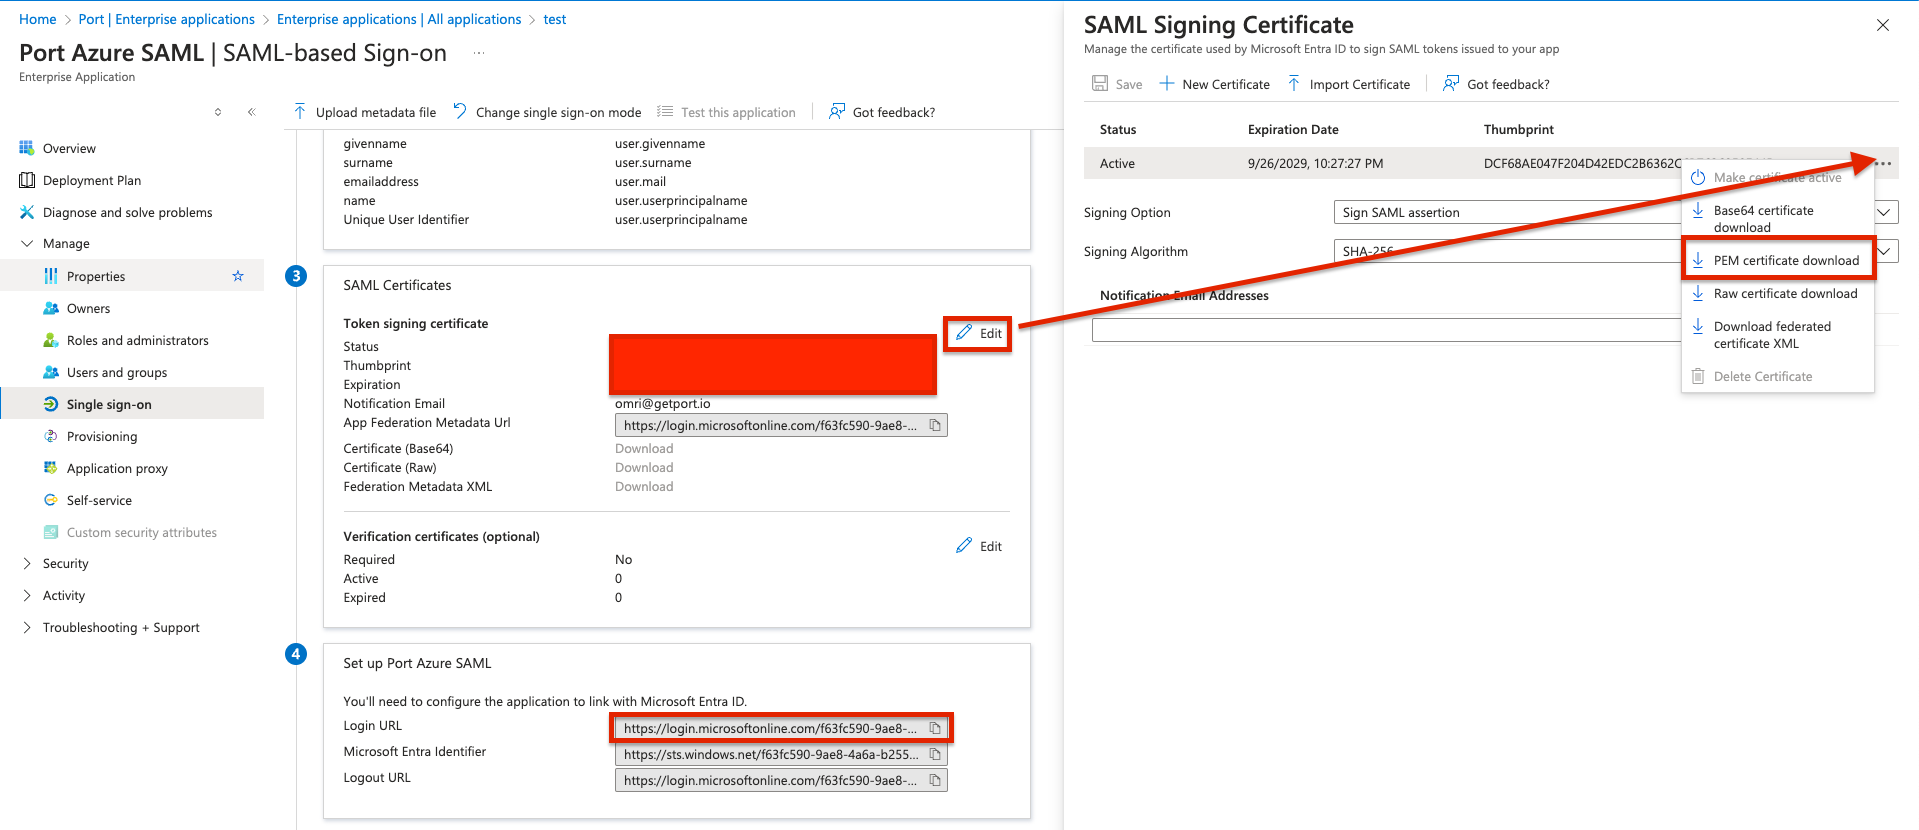
SAML certificates(step 3), Click the Edit button to expand the certificates section. Click the 3 dot icon next to the Active certificate, and choosePEM certificate download.
Send the PEM certificate file along with the Login URL (Which can be found in the Single Sign-on section, Card 4 (Set up)) to Port.

After that, Port will provide you with a metadata XML file for your connection.
At the top of the SAML configuration page, click on the upload metadata file button and upload the file provided to you by Port to complete the connection configuration.
Expose groups
In order to expose your Azure groups to Port via the application, do the following:
- Head to the
Single sign onsection in the application configuration, and edit theAttributes & Claims. - Press the
Add a group claimbutton - Select
Groups assigned to the applicationand in the source attribute selectCloud-only group display names. - Assign the relevant groups you want to expose to the application, these will be ingested into Port as teams you can use to manage user permissions and RBAC in your Port account.
SCIM Configuration (beta)
AzureAD SAML applications support SCIM.
Functionality enabled by SCIM
By enabling SCIM the following functionality will be enabled:
- Automatic deprovisioning of users (for example, when a user is unassigned from the SSO application, he will automatically lose acccess to Port)
Setup SCIM
To set up SCIM for AzureAD SAML based applications, contact Port's support team.
You will be provided with:
- An SCIM
endpoint - An SCIM
token
The endpoint and token will be used to set up the SCIM integration in your identity provider.
After receiving the SCIM endpoint and token, follow this step-by-step guide to enable SCIM.